
In this tutorial you will learn how to place a Drop Down Menu on your Blogger Blogspot blog. A Drop Down Menu will encourage readers as well as help them to quickely navigate to the page where ever they want to go. Drop Down Menu gives your Blog a stylish look. With the help of Drop Down Menu, you can show the most important pages quickly n easily like "Contact Us","About Us","FAQ" etc. pages.

1. Log in to Blogger
2. Go to Layout/Design > Template Designer > Advance > Add CSS
(Note: These settings are working fine as my template's width is 1000px )
3. Copy the following CSS code and past it into "Add CSS" section as shown in the image below:

4. To save this Click "Apply to Blog".
5. Now final step is again go to Layout/Design > Page Elements.

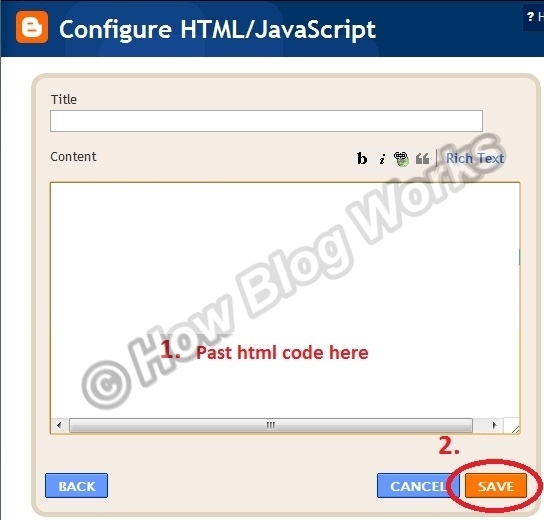
6. And Add a HTML/JavaScript Gadget and copy/past the following HTML code to make menu vicible on your site. Image given below.
(Note: edit links as well as name as per your need, instructions given below)

7. Click Save and you are done.
Some Drop Down Menus not work properly in Internet Explorer as well as other problems are there, So i decide to solve some most common issues and facts. you can visit this link (http://www.howblogworks.com/2011/10/solution-drop-down-menu-problem.html) to check if you have any issue with Drop Down Menu.
Tutorial to Make CSS Drop Down Menu for Blogger Blogspot Blog
1. Log in to Blogger
2. Go to Layout/Design > Template Designer > Advance > Add CSS
(Note: These settings are working fine as my template's width is 1000px )
3. Copy the following CSS code and past it into "Add CSS" section as shown in the image below:
#coolMenu,
#coolMenu ul {
list-style: none;
}
#coolMenu {
float: left;
}
#coolMenu > li {
float: left;
}
#coolMenu li a {
display: block;
height: 2em;
line-height: 2em;
padding: 0 1.4em;
text-decoration: none;
}
#coolMenu ul {
position: absolute;
display: none;
z-index: 9999999 !important;
}
#coolMenu ul li a {
width: "";
}
#coolMenu li:hover ul {
display: block;
}
/* Main menu
------------------------------------------*/
#coolMenu {
font-family: Arial;
font-size: 12px;
background: #DADADA;
}
#coolMenu > li > a {
color: #666666;
font-weight: bold;
}
#coolMenu > li:hover > a {
background: #FFFFFF;
color: #CC6600;
}
/* Submenu
------------------------------------------*/
#coolMenu ul {
background: #FEFEFE;
}
#coolMenu ul li a {
color: #CC6600;
}
#coolMenu ul li:hover a {
background: #EEEEEE;
}
#coolMenu ul li:hover a {
color: #666666;
}
#HTML4{
position: relative;
z-index: 10;
}

4. To save this Click "Apply to Blog".
5. Now final step is again go to Layout/Design > Page Elements.

6. And Add a HTML/JavaScript Gadget and copy/past the following HTML code to make menu vicible on your site. Image given below.
(Note: edit links as well as name as per your need, instructions given below)
<ul id="coolMenu">
<li><a href="http://www.howblogworks.com/" title="Home">Home</a></li>
<li><a title="Menu1">Menu1</a>
<ul>
<li><a href="http://submenuURL.com">Sub Menu1</a></li>
<li><a href="http://submenuURL.com">Sub Menu2</a></li>
<li><a href="http://submenuURL.com">Sub Menu3</a></li>
<li><a href="http://submenuURL.com">Sub Menu4</a></li>
</ul>
</li>
<ul>
<li><a title="Menu2">Menu2</a>
<ul>
<li><a href="http://submenuURL.com">Sub Menu1</a></li>
<li><a href="http://submenuURL.com">Sub Menu2</a></li>
</ul>
</li>
<li><a href="http://www.YourpageUrl.com/" title="Menu3">Menu3</a></li>
<li><a href="http://www.YourpageUrl.com/" title="Menu4">Menu4</a></li>
<li>
<a><form action="http://www.howblogworks.com/search" method="get">
<input class="textinput" name="q" size="20" type="text" /> <input class="buttonsubmit" name="submit" type="submit" value="search" /></form></a>
</li>
</ul>
7. Click Save and you are done.
Here are the Instructions to edit above mentioned code links as well as name as per your need:
1. Change the url of your page given up in blue color as per your need.
2. Change the Name of the menu you want given up in Red color.
3. The string above in the Pink color is the code of Search Box that i added to make a search option for my blog, you can delete that if you don't need it.(Note: Replace url address(www.howblogworks.com) with yours in search box code.)
4. You can add more main menu as well as sub menu by editing the whole structure.
Some Drop Down Menus not work properly in Internet Explorer as well as other problems are there, So i decide to solve some most common issues and facts. you can visit this link (http://www.howblogworks.com/2011/10/solution-drop-down-menu-problem.html) to check if you have any issue with Drop Down Menu.
No comments:
Post a Comment