Showing posts with label Blogger Feed Tips. Show all posts

Sunday, September 04, 2011


Guide to Blogger Blogspot FAQs


Guide to Blogger Blogspot FAQs. When you are looking for help with Blogger Blogspot you want to get that help as fast as possible that's why I have created a list of the most commonly asked questions by visitors to my blog. Use this post as a ready resource for all your frequently asked questions about blogging using the Blogger Blogspot blogging platform.


  • Banners and Advertising
  • Building Site Traffic
  • Common Blogger Problems Fixes
  • Customize Blogger
  • Gadgetize Blogger
  • Google Adsense
  • Monetize Blogger
  • Posting and Commenting
  • Publicize Blogger
  • Search Engine Optimization
  • Social Media
  • Tracking Site Visitors


Banners and Advertising FAQ
Where can I post a banner on Blogger Blogspot?
It is possible to add an affiliate banner to Blogger in a number of places. You can add a banner to the Blogger, above the header, above the first post, within a post, below a post, in a sidebar, and in a footer.

How do I place an advertising banner in a Blogger header?
Add an Affiliate Banner to the Blogger Header

How do I place an advertising banner in a Blogger sidebar?
Add an Affiliate Banner to Blogger Sidebar

How do I place an advertising banner above the Blogger header?
Add Google Adsense or banner above the Blogger header


Build Site Traffic
How do I encourage more visitors to my blog?
Find 10 hot tips to help you get visitors to your Blogger Blogspot blog
10 Tips to Build Traffic to a Blogspot Blog

Why do I need to add my blog to blog directories?
It is not essential to add your Blogger blog to blog direcories but it is a good idea since they are a valuable link and a ready source of traffic for your blog and Submit a Blogger Blog to Blog Directories

What blog directories should I add my blog to?
There are many blog directories on the net and more springing up all the time. For some recommended blog directories check out this article:
Submit a Blogger Blog to Blog Directories


Common Blogger Problem Fixes
How do I remove the navbar from Blogger?
You can't actually remove the Blogger navbar but there is a trick to hide it.
Hide Remove Blogger Navbar

How do I reinstate a deleted Blogger navbar?
I am often asked how to fix a deleted Blogger navbar. Find the solution in:
Hide Remove Blogger Navbar

How do I fix the missing comments form below posts? 
Many custom templates were created prior to Blogger embedding the comments form below posts. For details on how to upgrade your Blogger template to include an embedded comments form below posts on the single post page please refer to:
Add Missing Embedded Comments Form to Blogger

How do I fix the missing add a gadget in the layout screen?
If you can no longer see Add a Gadget in Layout > Page Elements then there is very likely a problem with your browser cache. Check out:
Missing Add a Gadget Solution in Blogger


Customize Blogger
How do I add categories to Blogger?
Blogger doesn't have categories only labels. If you want to add a categories section you can using a linked list but you will need to update it manually.
Add a Categories Section to Blogger

How do I add a list of recent posts to Blogger?
By making use of your blog's feed you can display the 5 most recent posts on your blog.
Add a Recent Posts Feed to Blogger

How do I display a list of recent comments on Blogger?
By making use of your blog's feed you can display the 5 most recent comments on your blog.
Add a Recent Comments Feed to Blogger


Gadgetize Blogger
How do I add a Live Traffic feed to my blogger Blogspot blog?
If you insert a free live traffic feed like Feedjit on your blog you will be able to watch visitors arrive at your blog in real time and gather information about where they came from, where they exited to, eearch engine keywords and keyword phrases used to access your blog.
Add Feedjit Live Traffic Feed to Blogger

How do I add a ratings widget to Blogger?
If you've seen star ratings on blogs you've visited lately and you would like to add one to your blog check out my article on the Outbrain ratings widget:
Add Outbrain Ratings Widget to Blogger

How do I add a bookmarking button to my blog?
Your visitors can share your posts with friends and add an online bookmark with an Add This Social Bookmarking button
Add a Social Bookmarking Button to Blogger

How can visitors subscribe to my blog?
You can encourage readers to sign up to regular updates of your blog by adding a subscribe button or link to your blog.
Add an Email Subscription Form and Links to Blogger Blogspot Blog


Google Adsense FAQ
Can I put Google Adsense on my Blogger Blogspot blog?
Yes you most certainly can. Unlike other online blogging platforms like Wordpress Blogger permits Blogger publishers to add Google Adsense to any Blogger blog. However be aware that spam blogs - that is blogs specifically set up to make money from Google Adsense are prohibited by Blogger.

How much money can I make from Google Adsense?
If your blog receives enough traffic (75+ visitors per day) you will be well placed to earn revenue from your Blogger Blogspot blog. Want to know more refer to:
Google Adsense Myths for Blogger Blogs

How Many Google Adsense Ad Units Can I Place on a Blogger Blog?
Google allows 3 content ads, 3 link ads and 2 search boxes on any given page. These rules are subject to change so if in doubt check Google Adsense FAQ.

How do I add Google Adsense to Blogger?
You will find many tips on the basics of adding Google Adsense to Blogger in this article:
Google Adsense Tips for Blogger

Where should I place Google Adsense on Blogger?
Better Placement of Google Adsense on Blogger
Blogger Guide to Google Adsense Placement


Monetize Blogger
How do I add a donate button?
Adding a Paypal donate button to a Blogger Blogspot blog will encourage satisfied visitors to say thanks.
Add a Paypal Donate Button to Blogger

How do I make money from my Blogger blog?
5 Easy Ways to Make Money from a Blogger blog


Posting and Commenting in Blogger
Why do the links to my post titles get shortened?
When you publish an article in Blogger a permalink gets created. If the title of your post is longer than about 35-40 characters Blogger shortens it. Check out this article for ideas on how to work around this issue
How to Create Search Engine Friendly Permalinks

How do I post date my posts?
Blogger allows publishers to post date their posts. Read the following article to find out more about how to set a future publishing date for a post
Choose Your Own Blogger Post Date

How do I date my posts with a date that has already passed?
Blogger will let you set a date for a post in the past, present or future. Find out more by reading the following article:
Choose Your Own Blogger Post Date


Publicize Blogger
Why is it important to burn my Blogger feed?
there are quite a few reasons reasons why it is a good idea to burn your Blogger Blogspot feed at Feedburner check out this article to find out more:
Blogger RSS Feeds and Feedburner

How do I burn my Blogger feed at Feedburner?
If you would like to burn your Blogger feed at Feedburner to build readership of your blog then this indepth article will show you how:
Burn Blogger RSS Feeds at Feedburner

How do I add a FeedFlare to a Blogger feed?
Not only will a Feedburner FeedFlare encourage your visitors to share your posts on various social media sites it will also copyright your material if you add this notice to the bottom of your posts. Learn more about Feedburner FeedFlares:
Add a Feedburner FeedFlare to a Blogger Feed


Search Engine Optimization
How do I get my Blogger Blogspot blog listed by major search engines?
If you wait for search engines to crawl your blog it may take a long time to appear in search engine results. You can speed up this process by submitting your blog and a sitemap to major search engines. Find out more:
Add Your Blog to Major Search Engines

How do I get listed by Yahoo?
For instructions on how to let Yahoo know about your blog and add a Blogger sitemap to Yahoo follow this guide:
Submit Your Blogspot Blog to Yahoo


Social Media
How do I add bookmarking button to my blog?
There are a number of ways to add social media to your blog. One easy way is add an all in one social bookmarking button by Add This.
Add a Social Bookmarking Button to Blogger

How do I add Twitter Links to Blogger?
How to Add a Twitter badge to Blogger
How to Add a Twitter Followers Counter to Blogger


Tracking Site Visitors
How do I know who is viewing my Blogger Blogspot blog?
There are a number of programs that can help you track visitors to your blog. One of the best, Google Analytics is provided free by Google. For more about Adding Google Analytics to a Blogger Blog

What gadget lets me watch visitors as they arrive?
If you want to see visitors arrive at your Blogger Blogspot blog you can put a free Feedjit live traffic feed widget on your Blogger sidebar.
Add Feedjit Live Traffic Feed to Blogger


Related Articles
List of How Blog Works Tutorials for Blogger Blogs
Read Full Post ...

Friday, September 02, 2011


Add Email This Post Link to Blogger

In this article you will learn how to place an email this post link or button at the bottom of each post in a Blogger Blogspot blog.

You may have noticed that some blogs give readers the option below their posts to email the article to themselves or a friend via a link or button. This affords readers yet another way to have access to your posts and a link for them to find you if they want to call back.

This email link should not be confused with the subscribe by email link which once a reader is signed up to will give them regular updates of each post you publish. This email link on the other hand only emails the reader the single post they are interested in.

There are several ways to place an email this post link on your Blogger Blogspot blog. Here are three methods known to me.

Add Email This Post to Blogger - Method 1
The easiest method. Adds an email button to the end of each post.

1. Login to Blogger if not already logged in

2. Navigate to Layout > Page Elements

3. Within the template click the Edit link on Blog Posts


4. A pop up menu will open. Under Select Items check the box labelled Show Email Post Links

5. Click Save

6. Click on View Blog and scroll to the end of your post to see the envelope button which has now appeared.


Add Email This Post to Blogger - Method 2

Another method of adding an email this post link to your blog is to add an all-in-one social bookmarking button to your Blogger Blogspot blog. All in one social bookmarking buttons are minimalist and reduce the clutter of having lots of buttons. Read the following article for information about how to add an Add This Social Bookmarking Button to your Blogger blog


Add Email This Post to Blogger - Method 3
By far the most advanced method and requires a change to your Blogger template. Yet another way to add an email this post link to your Blogger blog is to make use of your Feedburner FeedFlare if you have one. For information about getting a Feedburner FeedFlare for a Blogger feed and configuring it please refer to my article Add a Feedburner FeedFlare to a Blogger Feed

Assuming that you already have a burned feed at Feedburner (if not then read my article on how to Burn a Blogger RSS Feed at Feedburner and a FeedFlare set up follow these instructions to add an email this post link.

1. Click the My Account link at the top right corner of the Blogger navbar and then select Feedburner from the list of Google services or sign in to Feedburner directly.

2. Select your blog feed from the My Feeds List on the My Feeds page

3. From the Feedburner dashboard select the Optimize tab.

4. From the left sidebar menu select FeedFlare

5. On the FeedFlare page enable Email This by checking the box under the Site column. (Note the first column is what appears in the feed and the second column is what will appear on your blog). If you don't have your FeedFlare set up yet you can set up the FeedFlare options for both site and feed together at the same time. Follow my article about adding a Feedburner FeedFlare to Blogger for more on this.


6. Once you have checked the Email This option under Site and added any other options to the FeedFlare in the feed or site that you would like then click on Save. If this is a new FeedFlare then you will click on a button marked Activate instead.


7. After activating or saving you need to get the code to add to Blogger. Do this by clicking on the dropdown menu labelled Get the HTML code to put FeedFlare on your site and selecting Blogger from the list.

8. A pop up window entitled Adding FeedFlare to your Blogger blog will open with instructions on how to make the necessary changes to your blog. These are a bit confusing so I will break them down a bit here. Don't close this window yet as we will return

9. Login into Blogger if not already logged in

10. Navigate to Layout > Edit HTML.

11. Check the Expand Widgets Template

12. As a precaution back up you template

13. Scroll down to the following code or use CTRL + F to bring up the search tool.


<div class='post-footer'>


Note assumes you are using layout in Blogger. If you don't have this code you are likely to be using a custom template and will need to read the advanced instructions. Any problems just ask.

14. Copy the layout code in the Feedburner pop up window and paste it directly below this line <div class='post-footer'>

15. Click Save Template to save changes

16. Click View Blog to see the link in the footer of your blog posts


In this article I have suggested three different methods to add an Email This Post link to a Blogger Blogspot blog to give readers the option of emailing their favorite articles directly to themselves. If you get stuck or have problems with any of these methods please just ask and I will try to help.


Related Articles
Add Email Subscription Links to Your Blogger Blogspot Blog
Add a Social Bookmarking Button to your Blogger Blog
Add a Feedburner FeedFlare to a Blogger Feed
Burn a Blogger RSS Feed at Feedburner
List of How Blog Works Tutorials for Blogger Blogs
Read Full Post ...

Sunday, August 28, 2011


Add Email Subscription Form and Links to Blogger Blogspot


In this tutorial you will learn how to add an email subscription form to your Blogger Blogspot blog so that your visitors will have easy access to your latest updates via email. Adding an email subscription form to your blog is very easy to do and is one way to stimulate repeat visits to your blog.

Below is a step by step walkthrough of how to add an email subscription form to a Blogger blog. I have broken down the steps so that even beginners and newbies can easily follow the steps.

Why Offer the Option to Receive Updates Via Email?

If you are keen to have your visitors return to your blog then as a webmaster you can facilitate this by giving them options about how they would like to receive your updates. Receiving updates by email is just one of several options that you can offer your visitors to turn them from a one time visitor into a regular follower. Other common choices are to follow you in a reader such as Google Reader or alternatively follow you on Twitter. I have recently set up my feed to feed directly into Twitter using the Twitterfeed service so that my readers can follow me on Twitter.

How to Set Up an Email Subscription Form at Feedburner
In order to set up an email subscription link or form at Feedburner you first need to have your feed burned by Feedburner. If you are not sure how to do this please read my step by step article on burning a Blogger RSS Feed at Feedburner or follow these brief instructions

1. If you are using your Google Account click on the My Account link and choose Feedburner from the list. Alternatively go to Feedburner and sign in. If you aren't registered you can quickly create a free account using your Google Account.

2. After logging in you will be taken to the My Feeds Page. If you already have your feed burned skip to Step 3 otherwise follow these instructions to burn your feed.

If you need to burn your feed first enter the URL of your Blogger blog into the Burn a Feed Right This Instant box and click Next.


You will need to enter the title of your new feed. I suggest you use your blog title as your title. You will also be asked to choose a feed so choose the RSS Feed. You will then be taken to a success page and a message something like Congrats! Your FeedBurner feed is now live. After clicking Next you will now be prompted to customize your options. Read how to do this in my article about burning a Blogger RSS Feed at Feedburner. Once you have finished customizing your options click Next to proceed to the My Feeds Page.

3. Once you have your feed click on the link to it from the My Feeds Page. This will direct you to the Feedburner dashboard.

4. Now select the Publicize tab.

5. From the left sidebar click Email Subscriptions

6. Scroll down to the bottom of the page and click on the Activate button. If you are not sure what email address you are using for your account you can check this first.

7. You will now be taken to the Subscription Management Page.


8. Choose your language. The default is English

9. From the dropdown menu Use a Widget in select Blogger. The default is Typepad. The orange Blogger favicon will now show up.

10. To Automatically Insert the Subscribe By Email Widget into Blogger
  1. Click on the GO button next to the Blogger Widget.
  2. You will be taken to the Blogger Add Page Element Page where you can select your blog from a dropdown menu if you have more than one blog.


  3. Click on the Add Widget button and your subscribe by email widget will be added to your blog.
  4. You will now be taken to the Layout > Page Elements page
  5. Reposition your widget and save any changes. By default the widget is added to the top of your Blogger sidebar.

Note:If you find that the Page Elements Page does not load properly click on View Blog and you will find that the widget has been inserted. You can then go back and reposition it.


To Manually Insert the Subscribe By Email Widget into Blogger
  1. Copy the code and navigate to the Layout > Page Elements screen in Blogger.
  2. Select Add a Gadget in the area you wish the subscribe by email widget to appear (in most cases this will be the sidebar).
  3. Choose HTML/Javascript widget
  4. Paste the widget code into the content box
  5. Click on the Save Button
  6. Reposition the widget if necessary. A good place is at the top of the right sidebar and Save.
  7. Click on View Blog to see your new email form in your blog


Add an Email Subscription Link to Blogger
Note you can also add an email subscription link to your blog. Either copy and paste the link from the Feedburner Subscription Management Page into your blog or you can automatically insert it by following the same steps as with the automatic insertion of the email subscription form. You will find the code for the link in a text box below the code for the form on the Subscription Management Page. Email subscription links are useful both in the sidebar and beneath each post.


Check Your Subscribe By Email Form is Working Correctly
Once your subscribe by email widget is safely installed your form is ready for use. I suggest you test drive it to make sure it is performing correctly. Besides if you sign up you will have at least one subscriber right? Also you may want to regularly check who is subscribing to your blog by email by navigating to the Feedburner > Publicize page for your blog.

1. On the homepage of your blog enter your email address and click on the Subscribe button.
2. You will be take to a Feedburner Email Request screen with a captcha check for spam. Enter the sequence of alphanumeric characters into the text box.


3. Click on the Complete Subscription Request button
4. You will now be informed that your request was successful and that you will need to click on the activation code in an email that has been sent to you.
5. Open your email program and retrieve the email and follow the activation link. You will then receive an Email Subscription Confirmed notice from Feedburner. As the notice points out you will only receive an email if you make a post so you will need to get cracking on writing your next post.


In this tutorial you have learned how to add an email subscription form to a Blogger Blogspot blog so that your readers can enjoy receiving your most recents posts directly to their mailbox. Allowing visitors to sign up for your feed via email will promote your blog and can easily turn a new visitor into a regular follower. An alternative to an email subscription form is to insert a subscription link into your blog. I find a good place for an email subscription link is after each post to encourage visitors to sign up for my feed.


Related Articles
List of How Blog Works Tutorials for Blogger Blogs
Burn a Blogger RSS Feed at Feedburner
Read Full Post ...


Add a Recent Comments Feed to Blogger Sidebar

When you add a recent comments widget to a Blogger blog (Blogspot blog) using your Blogger comments feed you will encourage visitors to comment on your blog and hopefully improve blog traffic blog.
It only takes a couple of minutes to add a Recent Comments widget to Blogger. It is also easy since it requires no editing of your Blogger template. This Blogger tutorial assumes limited technical knowledge of Blogger and is mostly aimed at new bloggers and beginners although it is suitable for any Blogspot blogger looking to increase action on their blog.

If you would like to add a Recent Posts Feed to your Blogger website please refer to my earlier article Add a Recent Posts Feed to a Blogger Blog (Blogspot Blog)

Below I will take you through the steps of adding a feed widget to the Blogger sidebar so that the Blogger default comments feed will be displayed there. Equally you could add this widget to the footer if you prefer.

I am going to show you two different widgets to add Recent Comments to your blog. Which you choose is up to you and largely depends on how many comments you wish to display.


Method 1 - Using the Blogger Feed Widget to
Add Recent Comments Feed to Blogger
This first method is the old way to add recent comments to Blogger using the Blogger feed widget and is still my preferred method. The limitations are though that the maximum number of comments displayed is 5.


Method 2 - Alternative Method to Add Recent Comments Feed to Blogger
There is another Blogger widget that can be added to Blogger which will display up to 10 of the most recent comments on your blog. By default it shows the author's name and this can not be removed. If you are happy with this and would like more comments displayed this is a nice widget. One problem with the widget though is it will not necessarily display in the font of your blog. You will need to check this by installing it to try it out.


Method 1 - Add a Recent Comments Feed to the Sidebar of a Blogger Blog

  1. Login to you Blogger blog
  2. From the Dashboard go to Design > Page Elements
  3. Click on Add a Gadget in the sidebar
  4. Select the Feed widget from the list of Basic Widgets
  5. A popup dialog box will appear requesting you to configure the URL of your feed. Enter the following text into the box labelled URL Feed substituting the URL address of your blog name eg howblogworks.blogspot.com for yourblogname:


    http://yourblogname.blogspot.com/feeds/comments/default


  6. Click on continue. If you have entered the address of your comments URL feed correctly Blogger will retrieve your feed and display a preview in a dialog box. The feed will include links to the last five comments made on your blog.


  7. Unless you want less than 5 comments to display leave show 5 as is
  8. Under Title replace the name of your blog with Recent Comments instead
  9. If you want to be able to see the date of the comment check the Items Dates box
  10. If you want to have the comment author displayed check the Item/Sources Author
  11. Unless you are worried about visitors leaving your blog there is no real need to check Open in a New Window(note this option has been added since I first wrote this tutorial so it is not in the picture)
  12. Click on Save
  13. Click on View Blog to see your new Recent Comments feed in action.


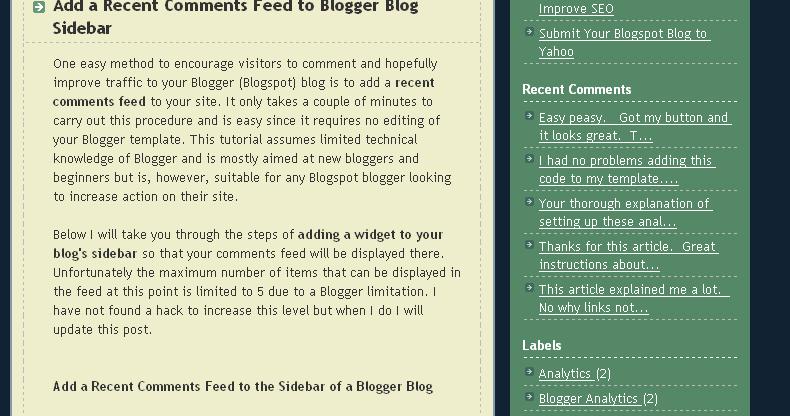
Below you can see an example of what the recent comments widget will look like. (Naturally it will be styled to suit your blog.) You can also see it operating in the sidebar of this blog.


8. If you want to change where it appears in the sidebar this can be achieved by returning to Design > Page Elements and using drag and drop to position the widget into the spot of your choice on the Blogger sidebar.

Troubleshooting
If you are using a feed delivery service like FeedBurner the default comment feed URL will be being redirected by Blogger.com. In this case you will need to enter the Feedburner address of the feed which is likely to be something like this:


http://feeds2.feedburner.com/Comments/YourSiteName


Notice how Feedburner capitalizes your blog name. Check the exact address at Feedburner if you are not sure of the feed address. For more on burning your feed at Feedburner check out these articles: Blogger RSS Feeds and Feedburner and Burn Blogger RSS Feeds at Feedburner and Add a Feedburner FeedFlare to a Blogger Feed

Method 2 - Using a Contributed Gadget to Add a Recent Comments Widget to Blogger (Blogspot)

  1. Login to you Blogger blog
  2. From the Dashboard go to Design > Page Elements
  3. Click on Add a Gadget in the sidebar
  4. Click on Most Popular from the menu on the left hand side of the Add a Gadget window
  5. Select Recent Comments
  6. Change the number of comments to display according to your individual blog requirements. The Preview box will show you what your widget will look like with less than 10 comments
  7. Change the Summary Length to 100 px or leave as is if you prefer


  8. Click on Save to activate your Blogger widget
  9. Click on View Blog to see your Recent Comments Widget displayed
  10. Use drag and drop in Design > Layout to position your widget as you desire


This Blogger tutorial has demonstrated two different methods of adding a recent comments gadget to your Blogger blog (Blogspot blog) using Blogger widgets. The recent comments widget is probably best displayed in the Blogger sidebar or it can be moved to the footer if you prefer and of course depending on your blogger template.

Related Articles
List of How Blog Works Tutorials for Blogger Blogs
Add a Recent Posts Feed to a Blogger Blog
Blogger RSS Feeds and Feedburner
Burn Blogger RSS Feeds at Feedburner
Add a Feedburner FeedFlare to a Blogger Feed
Read Full Post ...


Add a Recent Posts Feed to a Blogger Blog

One very simple way to increase page views of your Blogger (Blogspot) blog is to add a recent posts feed to your site. The procedure is easy and effective and does not require any template tweaking. This tutorial assumes limited technical knowledge of Blogger and is mostly aimed at new bloggers and beginners although it is suitable for any Blogspot blogger who wants to increase site traffic.


Below I will take you through the steps of adding a widget so that your feed is displayed in your Blogger blog's sidebar. Unfortunately the maximum number of items that can be displayed in the posts feed at this point is limited to 5 due to a Blogger limitation. I have not found a hack to increase this level but when I do I will update this post.


Add a Recent Posts Feed to the Sidebar of a Blogger Blog

1. Login to you Blogger blog and navigate to Layout > Page Elements

2. Click on Add a Gadget in the sidebar and select the Feed widget

3. A popup dialog box will appear requesting you to configure the URL of your feed. Enter the following text into the box:


http://yoursitename.blogspot.com/feeds/posts/default


Be sure to substitute yoursitename for the name of your site


4. If you have entered the address of your post's feed correctly Blogger will retrieve your feed and display a preview in a dialog box. The feed will include links to the last five posts on your site.

5. Delete the name of your blog and type in Recent Posts instead


6. Click on Save

7. Click on View Blog to see your new Recent Posts feed in action.


8. If you want to change where it appears in the sidebar this can be achieved by returning to Layout > Page Elements and using the drag and drop feature to position the widget.


Troubleshooting
If you are using a feed delivery service like FeedBurner your default feed URL will be being redirected by Blogger.com. In this case you will need to enter the Feedburner address of the feed which is likely to be something like this:


http://feeds2.feedburner.com/YourSiteName


Notice how Feedburner capitalizes your blog name. Check the exact address at Feedburner if you are not sure of the feed address. For more on burning your feed at Feedburner check out these articles: Blogger RSS Feeds and Feedburner and Burn Blogger RSS Feeds at Feedburner and Add a Feedburner FeedFlare to a Blogger Feed


This tutorial demonstrates how to add a recent posts feed to your Blogger (Blogspot) blog so that it can be displayed in a widget in the sidebar of your Blogger blog.

Related Articles
Add a Recent Comments Feed to a Blogger Blog
Blogger RSS Feeds and Feedburner
Burn Blogger RSS Feeds at Feedburner
Add a Feedburner FeedFlare to a Blogger Feed
Read Full Post ...

Friday, August 26, 2011


Submit Your Blogspot Blog Sitemap to Google

I often see questions from beginner bloggers in forums about adding a sitemap of their Blogspot blog to Google. This is surprisingly easy to do although there is virtually no documentation about how to go about it. That's why I have written this tutorial with the beginner blogger in mind. It provides a set of simple step by step instructions to guide you through the process of adding a sitemap to Google. By following this tutorial you will have your Blogspot sitemap added to Google in less than 5 minutes flat.

Why Add a Sitemap to Google?
As Google owns the Blogger.com platform most sites are indexed by Google automatically. However, you might find as I have done that this process doesn't always run as smoothly or as quickly as you might like. Manually adding a sitemap to Google has some distinct advantages:


More likely to have timely indexing of your blog
More likely that all URLs on your site will be accessed
More frequent updating of your blog index in response to new posts
Increase in site traffic as a result of all your pages being indexed


Step by Step Guide to Adding Sitemap to Google
Follow this step by step walkthrough of how to add a sitemap to Google to your Blogspot Blog and begin enjoying the benefits.

1. Sign in to Google Webmaster Tools
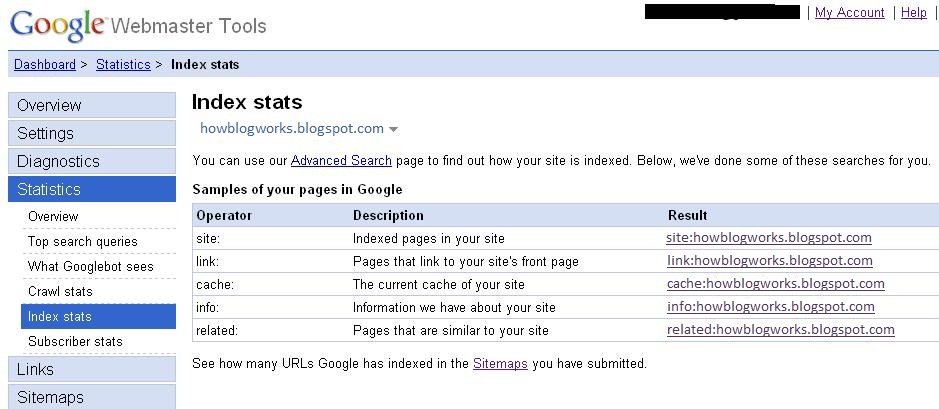
Once set up this site will give you detailed analysis about how Google indexes your blog. Best way to get to Google Webmaster tools is to click on My Account on the Blogger Navbar and then choose Google Webmaster Tools from the list.

2. Navigate to the Webmaster Tools Dashboard
Directly below the word "Dashboard" in the top lefthand corner you will see the option to add a site. Click once inside the box to remove the default text. Now enter the full URL of your site in the box including the prefix http:// and click on the "Add Site" button. For example to add this site "howblogworks" you would enter http://howblogworks.blogspot.com/

3. Navigate to Webmaster Tools Overview
If all is going well you will now see your site in a list below the "Add Site" box. Click on your site in the list and you will be taken to "Dashboard>>Overview." It is easy to check you are in the right place as your site name will be listed in blue below the word "Overview".

In the overview menu you will find details about Google's current indexing of your site. If Google hasn't indexed your site yet you will see the message "No pages from your site are currently included in Google's index" displayed. Alternatively if Google has already discovered your site then you will get the following message "Googlebot has successfully accessed your home page" and "Pages from your site are included in Google's index."

4. Select Method of Verifying Your Site
Whether the pages of your site have been indexed or not you will be asked to click on the "Verify Your Site" link in the yellow box. At this point you will be given 2 options: one to verify your site by uploading an HTML file and the other by inserting a meta tag into the HTML coding on your site. As you do not have access to the server on Blogspot you will need to choose the second option. To do this select "add a meta tag" in the dropdown menu entitled "Choose Verification Method."

Immediately you make your choice you will be presented with a couple of lines of text which you will need to copy to the clipboard of your computer.

5. Go to Blogger Layout Tab of Your Site in a New Window
In another window open Blogger and sign in if you are not already signed in. From the Dashboard navigate to the "Layout" menu of your blog by clicking on the Layout tab. If you have created more than one blog make sure that you click on the appropriate title of your blog.

6. Edit the Template of Your Blog in Blogger
In the Layout menu follow the “Edit HTML” link (third from left under the Layout tab). At this point you need to search through the coding in the template for the first "Head" tag. This will be somewhere between line 7 and 10 from the top. Once you have located the correct spot paste the code for the metatag you created in Step 4 directly into the template taking care not to overwrite any existing code. Click on the "Save Template" button to update your blog.

If you wish to err on the side of caution you might consider backing up your template before you make any changes to it however as long as you are careful this precaution is probably not necessary.


8. Return to Webmaster Tools and Verify Site
Once you have saved the changes to your template return to Webmaster Tools and click on the "Verify" button at the bottom of the page in the "Dashboard>>Verify a Site" screen. You will then receive coonfirmation from Google that your site has been verified.

9. Navigate to Sitemaps in Webmaster Tools
Once your site is verified you can now move on to adding your sitemap. To do this navigate to Sitemaps by following the "Sitemaps" link in the sidemenu. This will take you to "Dashboard >> Sitemaps" where you will see a box with the URL of your site already added. Next to the box will be a button labelled "Submit Sitemap."

10. Add Sitemap in Webmaster Tools
As your blog was created in Blogspot we are going to make use of the rss or atom feed. Either can be used for this purpose.

On the Sitemaps page in Webmaster Tools type either atom.xml or rss.xml into the box provided to extend the displayed URL and click on the "Submit Sitemap" button. Using the same example as before http://howblogworks.blogspot.com/ becomes either

http://howblogworks.blogspot.com/atom.xml
or
http://howblogworks.blogspot.com/rss.xml

All going well Google will then display a message indicating that your sitemap submission is pending. It can take some hours for your sitemap to be fully updated by Google. At that point you will be able to see the number of URLs identified by Google and the time of the last download. This is useful information as it will help you keep tabs on your for your Blogger.com blog site and identify any URLs that may be being missed. Now that you have your sitemap in place you can look forward to increased traffic as more visitors will now be able to find your site.


Read This If Your Feed is Being Redirected
If you are redirecting your feed because you are using Feedburner for example you will need to add a query parameter to stop the redirect so that it will act as a sitemap.

Therefore instead of adding atom.xml you will need to add atom.xml?redirect=false to the site URL in the "Submit Sitemap" box. Thus http://howblogworks.blogspot.com/atom.xml becomes http://howblogworks.blogspot.com/atom.xml?redirect=false

If you have a lot of posts it would be worth your while adding the following parameter to have all your posts included:
atom.xml?redirect=false&start-index=1&max-results=100

In the above example Google will index your first 100 posts. If you have more than 100 posts you can create another sitemap in which case you would start your index at 101 instead of 1.

This tutorial has guided you through the process of authenticating your Blogger blog at Google Webmaster and adding a sitemap to ensure better crawling and indexing of your website.

Related Posts
List of How Blog Works Tutorials for Blogger Blogs
Read Full Post ...


Add a Blogger Sitemap to MSN Bing Webmaster Tools

How to add a Blogger Blog and Blogger Sitemap (Blogspot Sitemap) to Bing Webmaster Tools formerly MSN Live Search. Step by step instructions for Blogspot bloggers who want to improve search engine optimization of their blog.
Although Bing (formerly MSN Live Search) gets a fraction of search engine traffic compared to Google and Yahoo it is still worthwhile submitting your Blogger sitemap (Blogspot sitemap) and blog to Bing. The advantages of adding your blog to Bing is that you will learn more about how your site is crawled and what keywords visitors use to access your blog pages.

+++++++ INSTRUCTIONS +++++++

How to Add a Blogger Blog (Blogspot Blog)to Bing Webmaster Tools

  1. Create an account or sign into Bing at MSN. If you have a hotmail account you will already have access to Bing Webmaster Tools
  2. Navigate to the Bing Webmasters Tools page
  3. Installing Skylight is purely optional. Silverlight is Microsoft's competitive product for Adobe Flash. Try it if you wish as it adds some extra functionality but for the purposes of this Blogger tutorial it is not necessary.
  4. From the Bing Webmaster home page click on Add Site
  5. Fill in the URL address of your Blogger blog eg howblogworks.blogspot.com


  6. Click on Submit
  7. Your blog will now appear on the list of added sites under your Bing Webmaster account


  8. Click the Verify Site link at the right of your blog

  9. Choose Option 2 - Add meta tag to your default webpage


  10. Copy the meta tag code that appears in the dialog box by right clicking on it with your mouse and selecting copy. Keep the Bing Webmaster Tools window open as we will be returning


  11. Login to your Blogger account if not already logged in using a different browser window
  12. From the Dashboard go to Design > Edit HTML
  13. Paste the code below the <head> tag and before <b:skin> and as early as possible

    For the new generation of default Blogger templates I suggest placing the code just below these two lines:


    <head>
    <meta content='IE=EmulateIE7' http-equiv='X-UA-Compatible'/>


    For earlier generations of default Blog templates and custom templates I suggest you place the Bing Webmaster meta tag after these lines:

    <head>
    <b:include data='blog' name='all-head-content'/>

  14. Click on Save Template
  15. Return to Bing Webmaster and click on the Verify button
  16. If successful your Blogger blog will be added to the list of sites. Information about your blog will show not available as it takes at least 48 hours to activate.


  17. Click on your blog and you will be taken to the site information screen. Notice the menu (bank of tabs) for easy navigation (as pictured). Use the dropdown menu to navigate between your blogs if you add more than one to Bing Webmaster.



How to Add a Blogger Sitemap (Blogspot Sitemap) to Bing Webmaster
  1. Sign in to Bing Webmaster if not already signed in
  2. Click on your Blogger blog from the list of sites
  3. Click on the Crawl tab from the top menu
  4. Click on Sitemaps from the menu on the left hand side


  5. An Add Sitemap dialog box will pop up. Enter the following URL of the default posts feed of your Blogger blog eg


    http://yourblogname.blogspot.com/feeds/posts/default


    Replace the yourblogname with the name of your blog

  6. Click on the Submit button
  7. If you have entered the details of your sitemap correctly you will now be presented with a added sitemap success screen


In this Blogger tutorial I have taken you through the steps involved in submitting a Blogger blog (Blogspot blog) to Bing Webmaster Tools (MSN). I have also shown you how to add a Blogger sitemap to Bing Webmaster Tools by using the default Blogger posts feed.


In this tutorial we have discussed in detail how to submit your Blogger Blogspot blog to MSN Live Search, authenticate your site and add a sitemap.

Related Posts
Submit a Blogger Sitemap to Major Search Engines
10 Tips for Blogspot Bloggers for Building Site Traffic
List of How Blog Works Tutorials for Blogger Blog
Read Full Post ...


Submit a Blogger Sitemap to Major Search Engines

If you haven't submitted your Blogger website and sitemap to the major search engines yet this article will help you through the process. Submitting your Blogger (Blogspot) blog to the two most popular search engines Google and Yahoo is a must if you want your site crawled and indexed quickly and, of course, to receive visitors. You may also want to cast your net a little wider. If so there are a couple of other search engines worthy of note that you may not have even considered. This article explores the steps involved in submitting your blog and sitemap to 5 major search engines: Google, Yahoo, MSN Live Search, Moreover.com and Ask.com


Submit Your Site and Sitemap to Google
For a step by step walkthrough of how to submit your Blogger blog to Google, verify your site and add a sitemap please refer to my article Submit Your Blogspot Blog Sitemap to Google


Submit Your Site and Sitemap to Yahoo
Yahoo has a fair share of the search engine market and therefore getting your Blogger blog crawled and indexed needs to be a priority. For an in depth discussion on how to submit your site, verify it and submit a sitemap to Yahoo Site Explorer please see my article Submit Blogspot Sitemap to Yahoo

Yahoo Site Explorer

Submit Your Site and Sitemap to MSN
You can now submit a sitemap directly to MSN at Webmaster Center. For detailed steps in submitting a Blogger site and sitemap to MSN Live Search please refer to my article Add a Blogger Sitemap to MSN Live Search


Submit Your Site and Sitemap to Moreover.com
Historically submitting your Blog sitemap to Moreover.com expedited indexing in MSN because of a standing arrangement that Moreover would provide the submitted feeds to MSN for crawling and indexing. At the time of writing this article it is not clear if this is still useful as sitemaps can now be submitted to MSN directly. However, it can't do any harm so I suggest giving it a go.

To submit a sitemap to Moreover copy and paste the following line into your internet browser address taking care to replace yoursitename with the actual name of your site:


http://api.moreover.com/ping?u=http://yoursitename.blogspot.com/rss.xml


If all is well you will receive the success message.
message:

Thank you for your ping.


Submit Your Site and Sitemap to Ask.com
It is worth submitting your sitemap to Ask.com, previously known as Ask Jeeves. It is considered an important search engine and owns Excite, Bloglines, MyWay and iWon. Ask.com also is a participant in the Sitemaps Protocol Program.

It is easy to submit your Blogger sitemap to Ask.com. Simply copy (Ctrl + C command) and paste (Ctrl + V command) the following line into your internet browser address bar. Be sure to substitute yoursitename with the actual name of your site.


http://submissions.ask.com/ping?sitemap=http://yoursitename.blogspot.com/rss.xml


Provided there are no issues you will see the success screen:


This article explored how to go about submitting your blog and sitemap to 5 major search engines: Google, Yahoo, MSN Live Search, Moreover.com and Ask.com

Related Posts
Submit Your Blogspot Blog Sitemap to Google
Submit Blogspot Sitemap to Yahoo
Add a Blogger Sitemap to MSN Live Search
10 Tips for Blogspot Bloggers on Building Site Traffic
Read Full Post ...


Blogger RSS Feeds and Feedburner

In this article you will learn about Blogger Blogspot RSS feeds and about the benefits of burning your Blogger feeds at Feedburner.

What are RSS Feeds?
Your Blogger feeds are a means of distributing your blog content to the world. Feeds make it possible to maximise exposure of your blog's content beyond a few visitors browsing your blog. Feeds can be subscribed to via a web portal, news reader, or email. Feeds allow your blog content to be packaged into all sorts of widgets and gadgets and mobile devices that can be displayed just about anywhere.

RSS stands for Really Simple Syndication. RSS is a standardized web format used to create a document containing your blog posts, blog comments or any other content on your blog you choose including images, music and video. As Blogger has built in RSS feeds, everytime you publish a post Blogger automatically adds your post to the default feeds. How much of your Blogger post that is displayed in your feed depends on whether you have chosen your feed in full or short format. To check this setting in Blogger navigate to Settings > Site Feeds of your blog.

Blogger automatically produces your blog's feed in both Atom and RSS. RSS is becoming increasingly popular as the preferred format for feeds. Both Atom and RSS were developed to enable people to receive automatic updates of their favorite blogs and websites. While the format of each is different they do pretty much the same job which is to output updated content from your blog in a format that can be easily read in a feed reader.

The URL of Default Blogger Feeds

Default Blogger Post Feeds

Atom 1.0:
http://yourblogname.blogspot.com/feeds/posts/default

RSS 2.0:
http://yourblogname.blogspot.com/feeds/posts/default?alt=rss

Default Blogger Comments Feeds

Atom 1.0:
http://yourblogname.blogspot.com/feeds/comments/default

RSS 2.0:
http://yourblogname.blogspot.com/feeds/comments/default?alt=rss

Default Blogger Label-Specific Feeds

Atom 1.0:
http://blogname.blogspot.com/feeds/comments/default/-/labelname

RSS 2.0:
http://blogname.blogspot.com/feeds/comments/default?alt=rss/-/labelname


Encourage Visitors to Subscribe to Your Feeds blogger Subscription Links Widget enabled
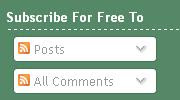
Whenever you see the familiar orange icon RSS icon on a website that denotes a RSS feed. By adding this RSS icon to your Blogger blog and setting up a link to your posts feed or other content visitors will be able to view your feed on click. If you have enabled the Subscription Links widget in Layout > Page Elements > Add a Gadget visitors are given the option to subscribe to both your posts and comments feeds in a reader such as Google Reader, My Yahoo or Bloglines. Alternatively you can burn your blog feeds with a free feedburning service like Feedburner.

Feed Readers Make it Easy for Readers to Keep Up-to-date
Your readers don't have to worry about manually saving your blog to their browser favorites anymore as Atom and RSS feeds make it easy to subscribe to a feed reader instead. Rather than visitors manually checking back on your site and trying to manage a bunch of bookmarks they can choose to subscribe to a reader. Subscribing in a reader means they will get up-to-the-minute content automatically without fear of missing any new entries.

Burn Your Blog Feeds with Feedburner
To make it even easier to get subscriptions to your blog it pays to burn your feeds with a feed burning service like Feedburner. The Feedburner service is now owned by Google and can accessed from your Google account. If you do intend to include Google Adsense on your feeds it is a good idea to burn your feeds. Please refer to my article Adding Google Adsense to Blogger RSS Feeds for help in setting up Google Adsense for your Blogger feeds. For assistance with burning your feed at Feedburner please see my article Burn Blogger RSS Feeds at Feedburner.

feedburner.com Home Page
By burning your blog's feeds at Feedburner you will be redirecting the Blogger default feeds to the new Feedburner feeds. When placing a link to your blog's feed visitors will have instant access to your feed. If, for example, there are 15 posts in your posts feed they will be able to browse all of these in chronological order complete with images.

You can choose to burn label feeds too if you find you have a lot of articles in one particular group. For instance if you blog is about fishing you might choose to have separate feeds for deep sea fishing and freshwater fishing.

Visitors also have the option to subscribe to any of your burned feeds in a large number of feed reader applications such as Google Reader, My Yahoo, Bloglines, Net Vibes, Newsgator to name a few. The advantage to the visitor of subscribing in a reader is that they do not have to keep visiting your blog to keep up with your latest posts. Instead they can read the most recent posts of all their favourite blogs from their reader which collects all their feed subscriptions into one central place.
Burned Feed at Feedburner - Feed Reader Choices
The option to get updates via a web-based feed reader is becoming increasingly popular with visitors. Even though the visitor may not be returning to your blog your feeds extend your blog's reach. Feedburner can provide accurate statistics about the number of subscribers to your feed and what type of reader they are using.

Feedburner Feed Count ButtonYou can also place a Feedburner Feed Count button on your blog which displays the number of these subscribers. Adding a Feedburner Feed Count button isn't a bad idea if your blog is attracting a decent readership. The purpose of adding such a button isn't so much to brag about it (although it is gratifying to see your readership climbing) but to lend some added credibility to your blog.

Why Burn a Blogger Feed at Feedburner?

Feedburner Provides Tracking Statistics of Subscribers
There are many reasons to burn your blog feeds at Feedburner but the main one is the facility to track your feeds to gain a better understanding of your blog's audience. Blog publishers who redirect their feed can monitor their growing readership.

It is useful to know how many people are opening and reading your feeds and how they're being used. Feedburner provides an easy method of tracking feeds that would be difficult to track otherwise. By redirecting your Blogger default feed to FeedBurner, important feed statistics such as the total number of subscribers, feed reader (aggregators) used, live hits, items used, uncommon uses, item views, item link clicks and item enclosure downloads for podcast can be recorded and analysed.

Feedburner Encourages Greater Reach
Attracting more readers to your blog and plugging into a wider network of eyeballs than you might have on your own account makes Feedburner an attractive option.

Feedburner Offers Improved Presentation of Your Blog Feed
Another advantage of Feedburner is that it allows for clean visual foramtting of your RSS feed for improved browser friendliness and presentation. Once burned your feed will be far more visually pleasing to readers. Improved presentation of your RSS feed is a powerful reason to begin redirecting your blog feed through Feedburner. Plus your readers can select their reader directly from the feed.

Feedburner Provides a Range of Services
By burning your blog feeds at Feedburner you get access to a range of services like Podcasting and the choice and flexibility of participating in the Feedburner Ad Network. Feedburner allows you to easily analyse, publicize, optimize and monetize your feed. Feed burning allows readers to subscribe regardless of what feed reader they happen to be using,


This article has discussed Blogger RSS feeds. It has outlined some of the benefits of burning your Blogger feeds at Feedburner. For instructions on burning your Blogger RSS feed at Feedburner please read my tutorial entitled Burn Blogger RSS Feeds at Feedburner.

Related Articles
Burn Blogger RSS Feeds at Feedburner
Read Full Post ...