Showing posts with label Blogger Gadgets. Show all posts

Friday, September 02, 2011


Solution to Missing Add a Gadget Feature in Blogger

If you are experiencing problems with the Add a Gadget feature not showing up in the Layout Screen of your Blogger Blogspot blog then read on as I have found the solution to this annoying problem.

The other day I discovered to my horror I had lost the option to Add a Gadget in the layout screen of all my blogs in Blogger. Typically it couldn't have happened at a worse time as I had just planned to sit down to write some new posts. I looked in the Blogger help section for the solution but could find no reference to the problem. I eventually found the answer, after about 15 minutes, buried in the Blogger Help Group section. I thought I would therefore post a short tip for anyone out there looking for a quick answer to the loss of the Add a Gadget function from the Layout Screen.

Clear Your Browser's Cache
When the Add a Gadget feature is missing from you Layout screen and you have tried refreshing it probably means you need to clear the cache of your browser. In Internet Explorer 6 you would go to the Tools menu and choose Internet Options from the drop down menu. In the dialog box that appears select the General tab and then click on the Delete Files from the Temporary Internet Files Section (middle). Once done close the dialog box and refresh the Layout Screen in Blogger. With any luck you will now be able to see the Add a Gadget option once again. For other browsers follow the directions in the browser's help section on clearing the cache or check out Bloggers Help Article about clearing cache.


A short tip on how to fix the problem of add a gadget missing from the layout screen in Blogger.


Related Articles
List of How Blog Works Tutorials for Blogger Blogs
Read Full Post ...

Wednesday, August 31, 2011


Add Simple Image Slider to Blogger

Today's tutorial will teach you how to add a very simple image slider to the sidebar or content area of your Blogger Blogspot blog. The image slider will enable you to show off your images to readers and makes a nice addition to a personal blog. Each scrolled image is linked to the related post so that readers can find the posts they are interested in very easily. When the reader hovers over the image the slider stops and resumes again when the mouse is removed.

This slider is so simple you will be able to have it up and running in about 5 minutes. No change to the template is required making it a breeze to install. Even if you are very new to Blogger and a beginner I will show you just how easy it is to add an image slider to your Blogger blog.

How To Add a Very Simple Image Slider to a Blogger Sidebar
(note this code will scroll the image from bottom to top)

1. Login to Blogger if not already logged in

2. Navigate to Layout > Page Elements

3. Click on Add a Gadget in Blogger sidebar

4. Select the HTML/Javascript widget from the list of available gadgets

5. Paste the following code into the content box of the gadget


6. Add a title to the widget if you wish

7. Substitute the url of your blog posts, the description of your image, the url of the image, and the title of the image for each image you wish to display. For example:


To find the URL of your blog post go to the individual post page and copy the url from the address bar in your browser.

To find the URL of the your image. Upload your image to a blogger post and copy the address enclosed in src=" " tags.

8. Save the gadget

9. Use the drag and drop feature to position the new widget in the sidebar

10. Click on save to save your changes

11. View your new widget in the sidebar of your blog

Tips and Troubleshooting
  • To change direction of the slider
    Please note that this code will scroll the image from bottom to top. If you would like it to scroll in the reverse direction all you need do is change the direction in the code from "up" to "down". Or alternatively you can scroll from left to right by setting "right" and right to left by setting "left"
  • To increase the size of the images
    To increase or decrease the size of the image displayed simply adjust the width and height parameters to suit your needs
  • To add more images
    To add more images to the slider add the following to the code before </marquee>


  • To adjust scroll speed
    Scroll speed is set to 5 by default but any number can be set between 1 and 20 with "1" being the slowest and "20" being very fast indeed.

In today's tutorial I have shown you how to add a very simple image slider to your Blogger Blogspot blog to show off the images on your blog. There are a number of other image and content sliders and image slide carousels that can be added to Blogger and I will be writing about some of these in my upcoming posts.


Related Articles
List of How Blog Works Tutorials for Blogger Blogs
Read Full Post ...

Tuesday, August 30, 2011


Add a Welcome Message to Blogger Blog

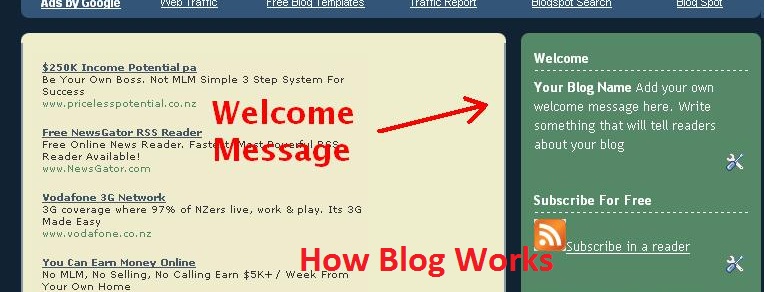
Would you like to welcome visitors to your Blogger Blogspot blog with a simple welcome message? In this tutorial I will show you how to add a short welcome message to your Blogger sidebar using the text gadget. This tutorial is aimed at beginner bloggers and those new to Blogger.

How to Add a Welcome Message to the Blogger Sidebar

1. Login to Blogger if you are not already signed in

2. From the Dashboard select the link to your blog. If you have more than one blog you will need to choose from a list of your blogs displayed on the dashboard

3. Navigate to the Layout > Page Elements page by clicking on the Layout tab and then the Page Elements link.

4. Click on Add a Gadget in the sidebar of your blog

5. Choose the Text gadget from the list.

6. Paste the following into the content box of the gadget:


To Your Blog Name. Add your own welcome message here. Write something that will tell readers about your blog


7. Bold Your Blog Name by highlighting the Your Blog Name text and selecting b from the formatting options

8. Type the word Welcome into the Title box

9. Click on the Save button to save the gadget

10. Click on the Save button in your template to save your changes

11. Click on View Blog and admire your new welcome message which will appear at the top of your blog's sidebar

12. Now you have an idea of what it looks like click on the back button of your browser to return you to the Page Elements screen


To Edit the Content of the Text Gadget
Select Edit by clicking on the edit link of the gadget in the sidebar and changing the contents or title and saving the changes

To Remove the Gadget
Select Edit by clicking on the edit link and choosing the remove button

In this tutorial for newbies and beginner bloggers I have outlined the steps necessary to add a text gadget to the sidebar of your Blogger Blogspot blog. By way of example I have shown you how to add a welcome message to your blog sidebar
Read Full Post ...

Sunday, August 28, 2011


Add a Categories Section to a Blogger Blog (Blogspot Blog)

Blogspot blogs at Blogger.com have no categories only labels. This Blogger tutorial will show you how to manually create categories in Blogger from your existing labels so that all the articles listed under a particular label will be displayed.

While this way to add categories to Blogger is not an ideal solution it will mean that you can display a logical grouping of your most popular articles under the one heading.

This article is aimed at new bloggers and beginner bloggers although it is suitable for all Blogger bloggers (Blogspot bloggers). No changes to the template are required to add these categories to your Blogger blog (Blogspot blog).

How to Create Categories from Labels in Blogger
One easy way to create a categories section in Blogger is to simply rename the title of the labels widget as categories. This solution does not work for me because on this blog I have a huge number of labels and I don't want to show this widget at the top of my sidebar.

An easy way round this problem is create a separate categories section. If you look at the sidebar of this blog you will notice that I have several major categories at the top so that a new visitor will find what they are looking for quickly under these broad headings.


To add a categories section to a Blogger blog (Blogspot blog) follow these simple steps:

1. Decide how you want to group your articles according to the labels applied and what group heading you want to give to each grouping of articles.

2. For the first category navigate to the individual page of the label you wish to use by clicking on the label in your sidebar. Copy the URL address of this page from the address bar in your browser (right click and select copy). For example the URL address of the label of Blogger Tutorials on this site is:


http://howblogworks.blogspot.com/search/label/Blogger%20Tutorials


3. From the Blogger Dashboard go to Design > Page Elements

4. Click Add a Gadget in the sidebar and select Links List

5. In the Configure Link List dialog box that appears paste the link to your label into the New Site URL box


6. Enter the name of your label or some alternative text if you wish into the New Site Name text box.

7. Enter Categories as the title

8. Choose between sort alphabetically, reverse alphabetically or don't sort

9. Click on Add Link to add the link to your new categories list

10. Click on Save

11. For every label you wish to put into the Categories Section copy the link and add it to the Configure Links List. By the end you will end up with two or more categories in your list

12. Use the up and down arrows for each link to shuffle them around until you find the desired order


Limit the Number of Posts Displayed in the Categories Section
To put a limitation on the number of posts displayed in the new categories section you will need to adjust the URL's of each label as follows:

From:


http://yoursite.blogspot.com/search/label/CategoryName


To:


http://yoursite.blogspot.com/search/label/CategoryName?max-results=max number of posts to display


So for the category Blogger Tutorials on this site for example I would enter the following to have only 25 posts displayed:


http://howblogworks.blogspot.com/search/label/blogger%20Tutorials?max-results=25


This Blogger tutorial has shown you how to manually add a categories section to the sidebar of your Blogger Blog (Blogspot blog) using the Link List widget.

Related Articles
List of How Blog Works Tutorials for Blogger Blogs
How to Add, Delete or Remove Blogger Image Borders
How to Align and Justify Posts in Blogger
How to Add a Divider Between Blogger Posts
How to Add or Change a Background Image in a Blogger Template
Read Full Post ...

Thursday, August 25, 2011


Make Money Add an Amazon Widget to Blogger

In today's tutorial you will learn how to place an Amazon widget on your Blogger blog (Blogspot blog) to enable you to add a further income stream to your existing Blogger earnings.

Adding an Amazon widget to Blogger is not difficult. No change or very little change to your Blogger template is required. There is some time involved in setting up the widget itself and choosing the products to link to and customizing the look to match your blog however. This tutorial will walk you through the steps involved but first a few need to know facts about Amazon's affiliate program.


Important Details For Bloggers About Amazon's Affiliate Program
  • Amazon have 2 referral structures: Classic Plan and Performance Plan

    • For the Classic Plan - A flat rate commission of 4% is paid
    • For the Performance Plan - A sliding scale between 4% and 8.5% commission is paid on general product items shipped. Consumer electronics is paid at a flat rate of 4%. Kindle, MP3,video on demand and game downloads are at the rate of 10%. 
  • Sell 7 items in a month and you will receive 6% commission on sales. Sell in excess of 30 items and receive referral fees at the rate of 6.5%
  • Affiliates earn commission on the total of items shipped not just the first product bought
  • Payment options are direct credit, check or Amazon Gift Certificate. There is a $15 charge for the issue of a check.
  • Payment of referral fees is made once your account reaches $10 provided you have opted for the direct credit or Amazon Gift Certificate option. Otherwise it is $100 for a check (cheque)
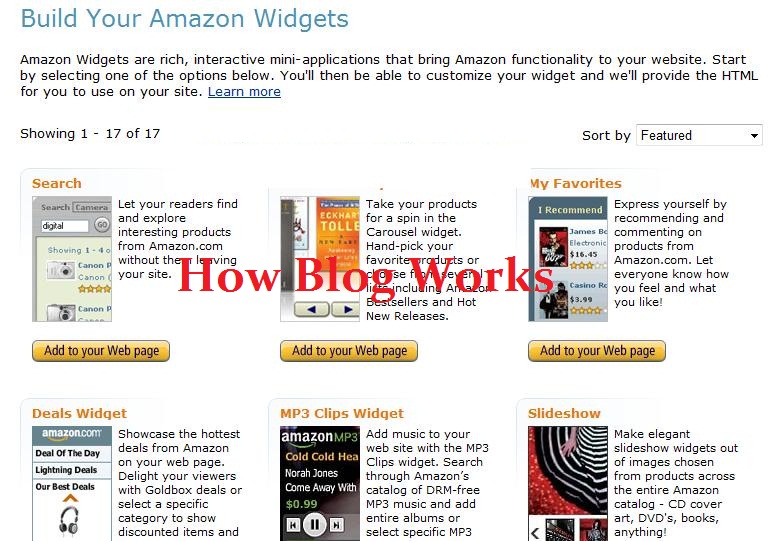
  • Amazon offer a choice of 17 different widgets
  • Amazon also offer links and banners and an astore option


Earning Money from Amazon Widgets
Linking to Amazon products on your blog can generate significant income depending on your blog topic and the type of links you choose. I personally find that my sales are not always related to blogging despite the Amazon widget on this blog linking to books about blogging. However I would strongly suggest that you try to match the products offerred to the general content of your blog so that your links are targeted to your blog's audience. Another option is to add a generic Amazon widget such as the Deals Widget to snag those bargain hunters and impulse buyers from your readership.

Placing Amazon Widgets on Blogger
There are 17 different Amazon widgets to choose from. The decision about which widget is best will partly be determined by the type of blog you have and where you want to place the widget.

I have had some success with the Carousel Widget I have found under the header to be a prime location for this gadget and as it is displayed on every page the widget is getting maximum exposure. I have also had moderate success with a sidebar location using the I Recommend widget. I think it is true to say that you will need to experiment a bit to find the best type of widget for your blog.

How to Add an Amazon Widget to a Blogger Blogspot Blog

Difficulty Level: Easy to Moderate

  1. Join Amazon's Referral Program and create an affiliate account at Amazon. You will need to supply your direct deposit details as Amazon charges to issue affiliate checks (cheques)
  2. Once your affiliate registration is confirmed (this is a fast process) you will then be ready to start to create an Amazon widget for your blog. So go ahead and login to your affiliate account at Amazon and click on the widgets tab
  3. Now comes the fun part - choosing a widget. Amazon currently have 17 different widgets to choose from. The Amazon help section is good and I suspect will answer most of your questions if you get stuck.
  4. Choose your widget. For the purposes of this demonstration let's choose a Recommended Product Links widget. Click on the Add to Your Webpage button
  5. From the drop down select a product line eg Cameras and Photo. Select a subcategory eg General Bestsellers. Click the Continue button.


  6. Select the size of widget according to the location where it will be placed on your blog eg 160x600 in the sidebar of Blogger. Click on the Select This Size button at the right of the example widget


  7. Now you will need to customize your widget. Click on Customize Link Appearance and enter link and text colors to suit your blog. Ensure that the widget opens in a new window unless you are quite happy for your readers to leave your blog. Leave this window open in the meantime as we will be returning


  8. In a new window login to Blogger if not already logged in
  9. Navigate to Layout > Page Elements
  10. Click on Add Gadget in the sidebar and choose HTML/Javascript from the list of available gadgets
  11. Copy the widget code which contains Amazon's tracking code and paste it into the content area of the gadget. Add a title if you wish. Click the Save button
  12. Use the drag and drop feature to reposition your widgets in the sidebar in the order that you want them to appear. Save any changes
  13. Click on View Blog and admire your new widget in the sidebar of your blog

Tips and Troubleshooting
Some placements of Amazon widgets will require tweaks to your Blogger template. For instance the Carousel widget which I mentioned earlier I inserted under the header in my blog. To place an Amazon widget or for that matter any widget below the header and above the first post in Blogger do the following:

  1. Login to Blogger if not already logged in
  2. Navigate to Layout > Edit HTML
  3. Find the following line of code


    <b:section class='crosscol' id='crosscol' showaddelement='no'/>

  4. Replace the no with yes and click the Save button
  5. Navigate to Layout > Page Elements
  6. You will see that you can now add a gadget below the header

In this tutorial you have learnt about adding Amazon widgets to a Blogger Blogspot blog in order to earn cash from referral fees. Most bloggers earn around 4 to 6.5% in commission for items shipped from Amazon. While not the best affiliate scheme Amazon referral fees can add up to tidy sum at the end of the month. I would recommend giving it a try. You will need to experiment to get the best fit of location and widget. Good luck and let me know how you get on.

Related Articles
Add Amazon Product Links to Blogger Posts
List of How Blog Works Tutorials for Blogger Blogs
Add Chititka Ads to Blogger Blogspot Blog
Add an Affiliate Banner or Adsense Above Blogger Header
Add an Affiliate Banner to Blogger Header
Add an Affiliate Banner to Blogger Sidebar
Add an Affiliate Banner Below Blogger Post
Make Money Add Banner Ads to Blogger
5 Ways to Make Money from Blogger
Blogger Guide to Google Adsense Placement
Add Paypal Donate Button to Blogger
Blogger Guide to Google Adsense Myths
Read Full Post ...

Tuesday, August 23, 2011


Add Paypal Donate Button to Blogger

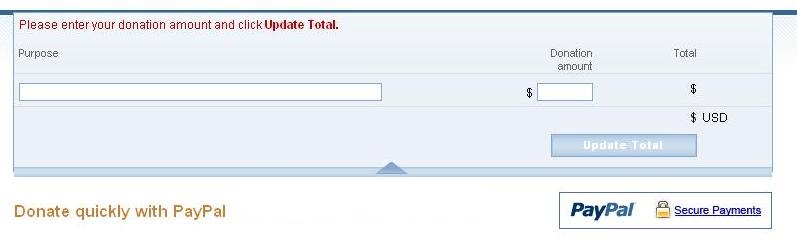
If you want to make a few bucks from all the hard work you are putting into your blog then consider adding a Paypal donate button to your Blogger blog (Blogspot blog).


Adding a donation button will encourage all those happy readers to say a big thank you for helping them out. Not everyone will donate but you will get the odd generous soul who will willingly donate some chump change to shout you a coffee.

In this Blogger tutorial we will be adding a gadget to the Blogger sidebar or alternatively you could place it in the foooter of your Blogger template. We will be using a widget to contain our Paypal Donate Button and will not be changing your Blogger template. If you wish to place the donate button into your Blogger posts see the end of this Blogger tutorial for details.

Skill level is rated easy.
How to Add a Paypal Donate Button to Blogger (Sidebar or Footer Gadget)

1. Get yourself a Paypal account if you don't already have one

2. Login to your Paypal account

3. Click on the Merchant Services tab


4. Choose Donations from the list of key features displayed in the right sidebar of the PayPal Website Payments Standard Option (first of 3 payment solutions)


5. From the Paypal Create a Payment Button screen choose Donation from the dropdown menu at Step 1. if it is not already selected.

6. Stick with the default button unless you wish to customize it

7. Choose your currency depending on your needs and location

8. Choose Donors enter their own contribution amount radio button unless you want to have a set amount


9. Ensure the Secure Merchant ID radio button is selected. This will prevent spammers getting hold of your email address

10. At Step 2 it is worth saving your button

11. At Step 3 Customize your checkout page by allowing donors to write a short comment by selecting the Yes radio button to special instructions to seller

12. Select the No radio button for Customer's Shipping Address

13. Select the Create Button button

14. Once Paypal creates the donate button code copy it by right clicking your mouse and choosing copy

15. Logout of Paypal

16. Login to Blogger if you are not already logged in

17. Go to Design > Page Elements

18. Click on the Add a Gadget link in the sidebar

19. Choose HTML/Javascript widget from the list provided

20. Paste the button code into the Content box of the dialog box that appears by placing the mouse inside the box and right clicking the mouse and then paste

21. Select a title like "Shout Me a Coffee Today!" or whatever you would like

22. Click on the Save button

23. Drag and drop your new donation gadget into the spot you want it to appear in

24. Click the Save button to ensure your changes are saved

25. Click View Blog to see your new donate button in the sidebar of your Blogger blog

26. Click on your new donate button and you will be taken to the Paypal Checkout screen


Tips and Troubleshooting

  1. To Add a Paypal Donate Button to Blogger Posts
    The following instructions will add a Paypal Donate button to all new Blogger posts. Note previous posts will not be changed. You will need to hard code the button into your Blogger template to have the Paypal Donate button added to every Blogger post. (Please ask if you need help with this)

    1. Follow the directions (steps 1-16) as above to get your Paypal button code
    2. In Blogger go to Settings > Formatting
    3. Paste the Paypal Donate Button code into the Post Template box
    4. Save changes
    5. Click on New Post to see that the code will be automatically inserted at the foot of each new post. (you will need to be in Edit Html mode to see the code)
  2. To Add a Paypal Donate Button to Individual Blogger Posts
    1. Follow the directions (steps 1-16) as above to get your Paypal button code
    2. In Blogger go to the post you wish to insert the button code into
    3. Insert the button code taking care to change all instances of double quotes to single quotes
    4. Save post and publish as normal. (If you have trouble with the preview post button in the old editor in Blogger click on compose and then edit html)


This Blogger tutorial has walked you through the steps needed to add a Paypal donate button to your Blogger blog (Blogspot blog) including how to configure your Paypal button at Paypal. I have covered adding the button as a sidebar gadget or footer gadget or alternatively added to Blogger posts. Have fun!


The measure of life is not its duration, but its donation.


Related Posts
List of How Blog Works Tutorials for Blogger Blogs
Tips for Adding Google Adsense to Blogger
Better Placement of Google Adsense in Blogger
Add Google Adsense to a Blogger Header
Bloggers Guide to Google Adsense Myths
Add Google Adsense or Banner Above Blogger Header
Blogger Guide to Better Google Adsense Placement
Make Money with Adsense Keywords and Blogger
Make Money By Adding Banner Ads to Your Blogger Blog
5 Easy Ways to Make Money from Blogger
Add Chitika Ads to Blogger Blogspot
Make Money Add an Amazon Widget to Blogger
Add Amazon Product Links to Blogger Posts
Read Full Post ...

Sunday, August 21, 2011


How to Add Missing Quick Edit Wrench to Blogger

In this Blogger tutorial (Blogspot tutorial) I show you how to add a quick edit wrench to Blogger if it is missing from a Blogger gadget. Check here to find a solution for a missing quick edit pencil not showing in Blogger

The quick edit feature allows you to edit a Blogger gadget directly from the blog itself rather than having to go through the Design > Page Elements screens and then finding the actual widget itself before you can edit it.

Heaps of times I have downloaded custom Blogger templates only to find that there are lots of omissions compared to a default Blogger template. If you are using a custom Blogger template with the quick edit feature missing here is a step by step guide to insert the missing quick edit feature into your Blogger template

The quick edit can be missing from anywhere in your Blogger template. I have chosen to use the sidebar for this tutorial but the solution works wherever the quick edit feature has been removed or never inserted in the first place.

Tutorial Difficulty rating: Easy
Time: Less than 5 minutes
Suitable for all levels of Blogger expertise

How to Add the Quick Edit Wrench to a Blogger Gadget


  1. Login to Blogger
  2. Go to Design > Edit HTML
  3. Check the Expand Widget Templates box
  4. Using CTRL + F buttons together bring up the search box
  5. Enter the following search term


    </b:includable>


  6. Scroll through your Blogger template. You will see that every instance of </b:includable> is highlighted in yellow.
  7. Once you come to the sidebar widgets which is the most likely place for the quick edit to be missing from look for something like the following (this will vary from template to template). This is the start of the first sidebar if you had a template with a two column sidebar

    <b:section class='sidebar' id='sidebar1' preferred='yes'>
  8. Now look at the picture below. You can see that this is the code for a Javascript/HTML widget as shown in red

  9. Just identify the widget that has the missing quick edit feature and add the following line of code immediately before the </b:includable>


    <b:include name='quickedit'/>


  10. Use the Preview button to check your changes before committing to them
  11. Don't forget to click on Save Template

In this Blogger tutorial (Blogspot tutorial) you have learned how to fix a missing quick edit button often missing from custom Blogger templates. No matter where the quick edit button has been omitted (sidebar, footer, header etc) it can be added in to a Blogger template very easily so that a Blogger gadget can be edited without having to go through the Blogger design screen.


Related Articles
List of How Blog Works Tutorials for Blogger Blogs
How to Show a Quick Edit Gadget Wrench in Blogger (Blogspot)
How to Fix a Missing Embedded Comment Form in Blogger
How to Fix Common Problems in Blogger
Read Full Post ...