Showing posts with label Buttons for Blogger. Show all posts

Tuesday, August 30, 2011


Add Printer Button or Link to Blogger Blogspot

Today's article will show you how to add a print button or printer link to your Blogger Blogspot blog. The facility to print a hard copy of a post may be important to some visitors especially if you are like me and publish lengthy posts. Adding a printer button or link will add to your blog's functionality and user friendliness.

The reason I am writing this article is in response to a reader who asked me how to print out posts without the sidebar showing up. All the suggested buttons and links print out the post only and not the sidebar, header or footer.

This tutorial involves changing the template code but is not difficult as long as you follow these step by step instructions.

How to Add a Custom Print Button to Your Blogger Blogspot Blog
The following instructions will place a printer button on each individual page of your blog below the post. Only the blog article itself will be printed along with any comments. The sidebar will not be printed.

Example of the printer button to be added:
1. Log in to Blogger if not already logged in

2. Navigate to Layout > Edit HTML

3. Back up your template by downloading full template to your computer

4. Check Expand Widgets Template

5. Bring up the search toolbar by using CTRL + F

6. Find this line by typing it into the search box:


<p><data:post.body/></p>


7. Now replace that line with the following code block:


<!-- Add Printer Button by http://howblogworks.blogspot.com/-->
<span class='noprint'><p><data:post.body/></p></span>
<b:if cond='data:blog.pageType == &quot;item&quot;'>
<a href='javascript:window.print()'>
<img src='http://i1020.photobucket.com/albums/af326/bookwise77/printer-button.gif'/></a></b:if>
<!-- End Add Printer Button by http://
howblogworks.blogspot.com/-->


8. Click on Save Template to save changes

9. Click View Blog to see your button in action

Note: If you want to change the printer icon to your own icon upload your image to a photo storage service like Photobucket and note the URL address of the icon. Now substitute the URL address of the existing image for your image by changing the line beginning with <img src='
Change printer icon to this alternative printer icon
So to change the printer image to another printer image the code would look like:


<!-- Add Printer Button by http://
howblogworks.blogspot.com/-->
<span class='noprint'><p><data:post.body/></p></span>
<b:if cond='data:blog.pageType == &quot;item&quot;'>
<a href='javascript:window.print()'><img src='http://i1020.photobucket.com/albums/af326/bookwise77/printer-button-2.gif'/></a></b:if>
<!-- End Add Printer Button by http://
howblogworks.blogspot.com/-->


How to Add a Printer Link to a Blogger Blogspot Blog
You may not want a button and prefer to add a printer link instead. To do this you would follow steps 1 to 6 and then insert the following code instead of the code contained in step 7


<!-- Add Printer Link by http://
howblogworks.blogspot.com/-->
<p><span class='noprint'><data:post.body/></p></span>
<b:if cond='data:blog.pageType == &quot;item&quot;'>
<a href='javascript:window.print()'>Print this post</a>
</b:if>
<!-- End Add Printer Link by http://
howblogworks.blogspot.com/-->


Save the changes to your template and then navigate to an individual post to see your link at the bottom of the post.


How To Add a Combination of Printer Button and Link
If you would like to display a printer button along with a link follow steps 1 to 6 and then insert the following code instead of the code contained in step 7


<!-- Add Combined Printer Button and link by http://
howblogworks.blogspot.com/-->
<span class='noprint'><p><data:post.body/></p></span>
<b:if cond='data:blog.pageType == &quot;item&quot;'>
<span style='background: url(http://i1020.photobucket.com/albums/af326/bookwise77/printer-button.gif) left no-repeat; padding-left: 28px;'>
<a href='javascript:window.print()'>Print this post</a></span>
</b:if>
<!-- End Add Combined Printer Button and link by http://
howblogworks.blogspot.com/-->


In this article I have shown you how to add a print button, a print link and a combined button and link to the bottom of your Blogger Blogspot posts. Enjoy!


Related Articles
List of How Blog Works Tutorials for Blogger Blogs
Read Full Post ...


Add Twitter Badge Button to Blogger

In this tutorial you will learn how to add a Twitter badge aka Twitter button to your Blogger Blogspot blog to link your blog to your Twitter account. By adding a Twitter button you will give your readers the option to follow your blog on Twitter.

Display a Twitter Icon in the Sidebar of Your Blogger Blog
If you look at the top of the right sidebar you will notice that I have placed a Twitter icon with a link to my Twitter profile. Adding the Twitter badge and link is not difficult and requires no change to the template. We will simply be adding a gadget to the sidebar. I have assumed no knowledge of Blogger and widgets so that absolute Blogger beginners can follow this tutorial.


1. Login to Blogger if not already logged in

2. Navigate to Layout > Page Elements

3. Click on Add a Gadget in the sidebar or other location eg the footer if you prefer

4. Select HTML/Javascript from the list of available gadgets

5. Paste the following code into the content box depending on your choice of button:


<a href="http://twitter.com/Your Profile"><img width="133" src="https://blogger.googleusercontent.com/img/b/R29vZ2xl/AVvXsEgaycIs3z54qnAP9GZB3jeo_Jlydx-W1rGKQOuve3N-9plgSlzWuhAQP_6_3RE15BCoXNQcEl-BSVOJz7ow2BaA1bUsUo4ViDoGNLgdsgon2hGHjN8ce1tqaUDG3b29IrFfKa7NXVbwGPk/s200/twitter-bar.gif" height="34" title="Follow Your Blog Name on Twitter"/></a><br/>


<a href="http://twitter.com/Your Profile"><img width="199" src="https://blogger.googleusercontent.com/img/b/R29vZ2xl/AVvXsEgL9-zCQeA51tU5wsVWIUx8t-jpCmQZ3aKPvTvEmVzbPl5FjIP4IeaIGyxzn0HCbFVVMKEJYVmJIhyUpl-IbDwpYYWRO1h4Ug9dxFNzvYsn_2POIjXj_scHwOQ3toKy3uGSryd2IbxFQNk/s200/twitter-35a.png" height="42" title="Follow Your Blog Name on Twitter"/></a><br/>


<a href="http://twitter.com/Your Profile"><img width="191" src="https://blogger.googleusercontent.com/img/b/R29vZ2xl/AVvXsEi66o2HjiJVxOLELDxSDqdqCDPCDfiHDnm_z6oMm-IKiBzUJL5LBh-Z8QBuNBpmsy8B416rfQwcjPdN0eR4UGUT8nLtd8mavuvGbX9XnVQJtJY6iZVmAm76DvjCWWboxNXocTkxc2DlL9M/s200/twitter-32a.png" height="58" title="Follow Your Blog Name on Twitter"/></a><br/>


6. Change Your Profile to your own Twitter profile. For example:


http://twitter.com/YourProfile

to

http://twitter.com/YourName


7. Substitute your blog name in the title for your own blog name


title="Follow Your Blog Name on Twitter"

to

title="Follow How Blog Works on Twitter"


8. Click on Save.

9. Move your new Twitter widget to the desired location on your sidebar using drap and drop

10. Click on View Blog to admire your new Twitter button


In this tutorial you have learned how to add a Twitter button, badge, icon to your Blogger Blogspot blog so that readers can sign up to follow you on Twitter. I have supplied you with a choice of three different buttons to get you started. For more Twitter buttons try these free Twitter vector icons or these free Twitter graphics or just type Twitter icons into your favorite search engine

Related Articles
List of How Blog Works Tutorials for Blogger Blogs
Add Twitter Followers Counter to Blogger
Read Full Post ...


Add a Twitter Followers Counter to Blogger

In this tutorial you will learn how to place a Twitter Follower Counter on your Blogger Blogspot blog to display the number of followers you have on Twitter. A Twitter count button will encourage readers to follow you on Twitter much in the same way as putting a Feedburner subscriber counter on your blog will encourage new subscribers.

How To Place a Twitter Followers Counter on Blogger

1. Login to Blogger if not already logged in

2. Navigate to Layout > Page Elements

3. Click on the link to Add a Gadget to the sidebar or footer

4. Select HTML/Javascript from the list of gadgets

5. Paste the following script into the widget content box depending on the button your prefer:


Standard Button
<script type="text/javascript" language="javascript" src="http://twittercounter.com/embed/?username=yourTwitterusername"></script>


Black Button
<script type="text/javascript" language="javascript" src="http://twittercounter.com/embed/?username=yourTwitterusername&style=black"></script>


Big Bird Button
<script type="text/javascript" language="javascript" src="http://twittercounter.com/embed/?username=yourTwitterusername&style=bird"></script>


If you would like to view more Twitter Counter badges you will find them at http://twittercounter.com/pages/buttons/

6. Replace the username with your own Twitter username. For example my username is blogwizz so I would enter username=blogwizz. If you are not already a member of Twitter sign up is a breeze

7. Enter a title for the widget if you wish

8. Click Save

9. Move your new widget into position on your sidebar by using Blogger's drag and drop feature

10. Click the View Blog link to admire your new Twitter Followers Counter


In this tutorial you have learned how to put a Twitter Followers Counter on your Blogger Blogspot blog so that you can display an accurate count of your Twitter followers. This will encourage other readers to begin following you on Twitter.


Related Articles
List of How Blog Works Tutorials for Blogger Blogs
Read Full Post ...


Tips to Add a Digg Button to Blogger Blogspot

Today's article discusses where to place a digg.com button on your Blogspot Blogger blog and shows you how to add an integrated digg button to your blog. The button allows your blog's visitors to digg posts from your blog and submit those articles to Digg.

What is Digg.com?
Digg is a social content site where readers submit stories, videos and images. Depending on interest and popularity articles are commented on by members. You can encourage your readers to digg your stories by adding a Digg button to your Blogger blog. The button will display a real time count of the number of times your post has been dugg.


Why Add a Digg Button to My Blogger Blogspot Blog?
Why would I want to add more buttons to my blog you may be wondering. Well there are a number of reasons why getting on board with Digg will be helpful to you in growing your blog.

  • Digg is a ready source of traffic that can drive visitors to your blog and it is too important to overlook. When visitors digg your stories it will encourage new readers to visit your blog.
  • Posts that have been submitted to Digg appear in search engine results so your blog will receive exposure.
  • A digg button will encourage visitors to submit your blog's content including images and video to Digg. This will encourage others to comment and write about your post and possibly link to it.

What to Consider When Choosing to Add Digg to Your Blog
When adding a Digg button to your Blogger Blogspot blog there are some important considerations to think of before you get started. You will need to decide about:

  • The look of the button to place on your blog as Digg gives you the option of several sizes to choose from. The look and feel of your blog will dictate what button you decide on.
  • What pages your Digg button will display on. Do you want it on the home page as well as the post pages for instance? I strongly advise that you place any integrated button only on post pages otherwise you will find the loading time of your homepage will be noticeably reduced.
  • What position to place the button in on your blog. Under the post title, beside the first paragraph, below the post are all common locations for a Digg button. Placing a button near the top of your posts can be a good ideas as visitors will see it as the page loads because the button will be above the fold ie the area that visitors see without having to scroll down. If you have a bunch of social media buttons at the bottom of your posts already you might want to include your Digg button in this sequence.

Can I Digg My Own Blog Content?
Yes. You most certainly can digg your own Blogger posts as this will get you a listing in Digg.

How to Add a Digg Button to Blogger Blogspot Blog
I am going to show you how to manually change your Blogger Blogspot template to include your Digg button. While this is not a difficult tweak you will be changing your template. Make sure you take care not to overwrite any code. My suggestion as always is back up first by downloading your template before beginning the addition of this code.

To add a large Digg button to appear next to the first paragraph in your Blogger Blogspot posts:


1. Login to your Blogger blog if not already logged in

2. Navigate to Layout > Edit HTML

3. Back up your template by downloading full template as a precaution

4. Check the Expand Widgets Template box

5. Find this line of code using CTRL + F

<p><data:post.body/></p>


6. Paste the Following code above <p><data:post.body/></p>


<!--Digg.com Button-->
<b:if cond='data:blog.pageType == &quot;item&quot;'>
<div style='float:right; margin-left:10px;'>
<script type='text/javascript'>
digg_url=&quot;<data:post.url/>&quot;;
</script>
<script src='http://digg.com/tools/diggthis.js' type='text/javascript'/>
</div></b:if>
<!--end Digg.com Button-->


7. Click on the Save Template button

8. Click on View Blog link and navigate to an individual post page. You will see your new digg button is only visible on the post page.

Customizing Your Digg Button Tips and Troubleshooting


  • To have the Digg button display on all pages not just the individual post pages remove this line:


    <b:if cond='data:blog.pageType == &quot;item&quot;'>


  • To have the Digg button aligned to the left instead of the right change this line from:

    <div style='float:right; margin-left:10px;'>

    to:

    <div style='float:left; margin-left:10px;'>


  • To replace the large button with the compact button replace the code in Step 6 with:

    <!--Digg.com Button-->
    <b:if cond='data:blog.pageType == &quot;item&quot;'>
    <div style='float:right; margin-left:10px;'>
    <script type='text/javascript'>
    digg_url=&quot;<data:post.url/>&quot;;
    digg_skin=&quot;compact&quot;;
    </script>
    <script src='http://digg.com/tools/diggthis.js' type='text/javascript'/>
    </div></b:if>
    <!--end Digg.com Button-->


  • To change the background color of the button from white to your own desired color add this line:

    digg_bgcolor=&quot;#ff9900amp;quot;;

    below this line:

    digg_url=&quot;<data:post.url/>&quot;;


    Note: Change the value #ff9900 to whatever hex color you would like.


  • To move the Digg button to below the post content instead of at the top paste the following code:

    <!--Digg.com Button-->
    <b:if cond='data:blog.pageType == &quot;item&quot;'>
    <div style='float:right; margin-left:10px;'>
    <script type='text/javascript'>
    digg_url=&quot;<data:post.url/>&quot;;
    digg_skin=&quot;compact&quot;;
    </script>
    <script src='http://digg.com/tools/diggthis.js' type='text/javascript'/>
    </div></b:if>
    <!--end Digg.com Button-->

    to the end of the section of code beginning with this line

    <div class='post-footer-line post-footer-line-2'>

    If you have a third post footer line then place this code after that block of code.


    In this tutorial you have learned about what Digg is and the benefits of adding an integrated Digg button to your Blogger Blogspot Blog. You have also learned about different placement options for your Digg button and been given step by step instructions on how to customize the Digg button to suit the needs of your blog.


    Related Articles
    List of How Blog Works Tutorials for Blogger Blogs
    Add a Social Bookmarking Button to Blogger

  • Read Full Post ...

    Monday, August 29, 2011


    Free Social Bookmark Buttons for Blogger

    One way to get your blog to grow is add social bookmarking buttons to your Blogger Blogspot blog. In an earlier article I wrote about the simplest way to place social media on a Blogger blog - that is to add an all-in-one Add This social bookmarking button.

    However, as one size doesn't fit all situations there may be lots of times when you would prefer to add individual social bookmark buttons to your Blogger blog. That's why I have put together this list of useful free social bookmarking button sets. All are free to use on a personal blog and most have no restrictions for commercial use either but please do double check the license when you download them if you want to use the buttons commercially.

    Best Sources of Social Bookmarking Buttons for Blogger Blogspot

    128 Completely Free Icons Set
    128 Icons available in 48×48px. Includes Social Media Icons such as: Design Float, Digg, Delicious, Furl, Technorati, Flickr, Stumble Upon, Twitter & more…

    Web 2.0 Icons (23 icons)
    23 freeware “iPhone-like” icons sized from 512X512 to 16X16 pixels. Includes Blinklist, BlogMarks, Delicious, Digg, FaceBook, Favorite, Feeds, FeedBurner, Flickr, Furl, Google Magnolia, Misterwong, Myspace, Newsvine, Netvibes, Reddit, Simpy, Stumbleupon, Technorati, Twitter, Youtube.

    Socialize (12 icons)
    12 high quality, free icons in these sizes: 16x16px, 32x32px, 48x48px, 64x64px and 128x128px and 32-bit transparency PNG file format.


    Handycons (12 icons)
    Handycons is a free, hand drawn social media icon set containing 12 icons. Package contains icons for del.icio.us, Digg, Mixx, DesignBump, StumbleUpon, Reddit, Developer Zone, DesignFloat, Technorati, Twitter and RSS feed & Email icon, of course. All icons are available in four sizes: 16x16, 24x24, 32x32 and 48x48 pixels.


    Handycons 2 (20 icons)
    20 more hand drawn icons following on from the first Handycons set. Package contains Facebook, Blinklist, Feedburner, Flickr, FriendFeed, Furl, Gmail, Google, Heart icon, Last FM, Linked IN, Magnolia, Newsvine, PayPal, Skype, Sphinn, Twitter, Vimeo, Yahoo and You Tube icons. All icons come in four sizes: 16x16, 32x32, 64x64 and 12x128px.


    Social Media Icons (26 icons)
    26 clean looking free social media icons available for personal or commercial use.

    Aquaticus Social (30 icons)
    30 Web 2.0 social media icons in 4 sizes. Free to use on blogs. List includes popular icons like: Blogger, Delicious, Digg, Facebook, flickr, furl, Google, Ma.gnolia, Mixx, MySpace, NetVibes, NewsVine, Reddit, StumbleUpon, Technorati, Twitter, Yahoo!
    Aquaticus.Social by ~jwloh on deviantART


    Social Me Icons (30 Icons)
    30 free iPhone-inspired icons that can be used on blogs and websites without restriction. 4 sizes up to 60x60px, 48x48px, 24x24px, 16x16px. List includes popular icons like: Blogger, Delicious, Digg, Facebook, flickr, furl, Google, Ma.gnolia, Mixx, MySpace, NetVibes, NewsVine, Reddit, StumbleUpon, Technorati, Twitter, Yahoo!
    Social.me by ~jwloh on deviantART


    Social Bookmark Iconset Pt I


    Social Bookmark Iconset Pt II


    Ok so that's my current list of some of the best free social bookmark icons available on the net suitable for a Blogger Blogspot blog. This is a pretty extensive list to get you started but I will add more as time goes on and I come across other great sets. If you find what you are looking for here please let me know and if not I would be interested in that too.


    Related Articles
    List of How Blog Works Tutorials for Blogger Blogs
    Add a Social Bookmarking Button to Blogger
    Read Full Post ...


    Add Social Bookmark Buttons to Blogger

    In today's Blogger tutorial (Blogspot tutorial) you will learn how to place social bookmark buttons in the sidebar, footer and below each post in a Blogger Blogspot blog. This is a social bookmarking script for individual buttons or icons rather than the Add This all-in-one solution that I have previously written about. These free social bookmark buttons will encourage social bookmarking SEO by having your visitors save their favorite content and hopefully share it on social media sites such as Digg, Technorati and Stumble Upon thereby helping to grow your blog traffic.

    I personally prefer to use an Add This social bookmark button because individual buttons can create a cluttered busy look. However, I also realize that the Add This social bookmarking button is not necessarily that recognizable to visitors who may have otherwise bookmarked your pages had the button been more recognizable to them.


    How to Add Social Bookmark Buttons to Blogger Sidebar or Footer

    1. Login to Blogger if not already logged in

    2. Navigate to Page Layout > Page Elements

    3. Click on Add Gadget in Sidebar or Footer

    4. Select HTML/Javascript gadget from the list of available gadgets

    5. Copy and paste the social bookmarking button code into the content box that is available for free download below. Note you will only be able to add the small social bookmarking buttons to the sidebar unless you only want a few of them.


    Download Code for Large Buttons (48x48)
    Download Code for Small Buttons (24x24)


    6. Add a title such as Bookmark and Share if you wish

    7. Click on the Save button

    8. Use the drag and drop feature in the sidebar to reposition the new widget if necessary and save again

    9. Click on View Blog to admire new social bookmarking buttons


    How to Add Social Bookmark Buttons Below Every Post in Blogger

    1. Login to Blogger if not already logged in

    2. Navigate to Page Layout > Edit HTML

    3. Back up your template as a precaution by downloading it to your computer

    4. Check the Expand Widget Templates box

    5. Find the following line of code using CTRL + F


    <p><data:post.body/></p>

    or

    <data:post.body/>


    6. Paste the button code below directly below this line


    Download Code for Large Buttons (48x48)
    Download Code for Small Buttons (24x24)


    7. Click on the Save Template button to save

    8. Click on View Blog to admire your new social bookmarking button set at the bottom of your blog


    Tips and Troubleshooting
    • To center the social bookmarking buttons

      <p><data:post.body/></p>
      <div align='center'>
      Your social bookmarking button code goes here
      <br/>
      </div>

    • To have your social bookmarking buttons only appear on post pages you will need to enclose the code in an if statement


      <p><data:post.body/></p>
      <b:if cond='data:blog.pageType == "item"'>
      Your social bookmarking button code goes here
      <br/>
      </b:if>

    • To center the social bookmarking buttons and have them appear only on post pages

      <p><data:post.body/></p>
      <b:if cond='data:blog.pageType == "item"'>
      <div align='center'>
      Your social bookmarking button code goes here
      <br/>
      </div></b:if>

    • To center the social bookmarking buttons and have them appear only on post pages

      <p><data:post.body/></p>
      <b:if cond='data:blog.pageType == "item"'>
      <div align='center'>
      Your social bookmarking button code goes here
      <br/>
      </div></b:if>

    • To add extra social bookmarking buttons to this set download the Aqauticus Icon Set
    • To change the social bookmarking buttons for another set simply do the following:

      1. To find other social bookmarking buttons please do check out my article Best Free Social Bookmark Button Sets for Blogger first as very likely you will find something suitable in that collection. Download your preferred icon set. These will be in a zip file so you will need to unzip them and take a look at what sizes are on offer. Most icon sets come in at least several sizes.
      2. Upload your button images to Blogger or to an image storage site like Photobucket or Flickr. One easy way to upload to Blogger is to create a post called images that you never publish. Then upload the images you want individually (that's the drawback). Copy the URL address of the button image and paste it into the social bookmarking button code replacing existing URLs
      3. Change the URL address of each button in the button code I have supplied. That's the code beginning with scr='

    In today's tutorial you have learned how to add social bookmark buttons using a social bookmarking script to the sidebar, footer and below each post in a Blogger blog (Blogspot blog). I have supplied you with the code for a small and large social bookmarking button set to get you started. I suggest you download the codes first and install them on your blog. Then it is just a simple matter of changing the URL address of the social bookmarking buttons if you wish to substitute these for a new set of social bookmarking buttons. Also in this tutorial I offered you some tips and troubleshooting suggestions for adding your social bookmarking buttons to Blogger. If there are other issues that crop up for you as always please ask. I am interested in hearing from anyone about how they got on installing these social bookmark buttons.


    Related Articles
    List of How Blog Works Tutorials for Blogger Blogs
    Add a Social Bookmarking Button to Blogger
    Best Free Social Bookmark Icon Sets for Blogger
    Read Full Post ...

    Tuesday, August 23, 2011


    Add Paypal Donate Button to Blogger

    If you want to make a few bucks from all the hard work you are putting into your blog then consider adding a Paypal donate button to your Blogger blog (Blogspot blog).


    Adding a donation button will encourage all those happy readers to say a big thank you for helping them out. Not everyone will donate but you will get the odd generous soul who will willingly donate some chump change to shout you a coffee.

    In this Blogger tutorial we will be adding a gadget to the Blogger sidebar or alternatively you could place it in the foooter of your Blogger template. We will be using a widget to contain our Paypal Donate Button and will not be changing your Blogger template. If you wish to place the donate button into your Blogger posts see the end of this Blogger tutorial for details.

    Skill level is rated easy.
    How to Add a Paypal Donate Button to Blogger (Sidebar or Footer Gadget)

    1. Get yourself a Paypal account if you don't already have one

    2. Login to your Paypal account

    3. Click on the Merchant Services tab


    4. Choose Donations from the list of key features displayed in the right sidebar of the PayPal Website Payments Standard Option (first of 3 payment solutions)


    5. From the Paypal Create a Payment Button screen choose Donation from the dropdown menu at Step 1. if it is not already selected.

    6. Stick with the default button unless you wish to customize it

    7. Choose your currency depending on your needs and location

    8. Choose Donors enter their own contribution amount radio button unless you want to have a set amount


    9. Ensure the Secure Merchant ID radio button is selected. This will prevent spammers getting hold of your email address

    10. At Step 2 it is worth saving your button

    11. At Step 3 Customize your checkout page by allowing donors to write a short comment by selecting the Yes radio button to special instructions to seller

    12. Select the No radio button for Customer's Shipping Address

    13. Select the Create Button button

    14. Once Paypal creates the donate button code copy it by right clicking your mouse and choosing copy

    15. Logout of Paypal

    16. Login to Blogger if you are not already logged in

    17. Go to Design > Page Elements

    18. Click on the Add a Gadget link in the sidebar

    19. Choose HTML/Javascript widget from the list provided

    20. Paste the button code into the Content box of the dialog box that appears by placing the mouse inside the box and right clicking the mouse and then paste

    21. Select a title like "Shout Me a Coffee Today!" or whatever you would like

    22. Click on the Save button

    23. Drag and drop your new donation gadget into the spot you want it to appear in

    24. Click the Save button to ensure your changes are saved

    25. Click View Blog to see your new donate button in the sidebar of your Blogger blog

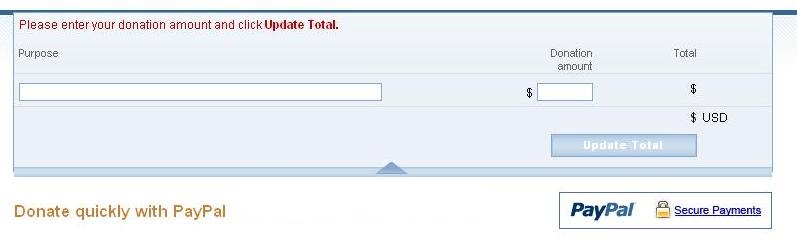
    26. Click on your new donate button and you will be taken to the Paypal Checkout screen


    Tips and Troubleshooting

    1. To Add a Paypal Donate Button to Blogger Posts
      The following instructions will add a Paypal Donate button to all new Blogger posts. Note previous posts will not be changed. You will need to hard code the button into your Blogger template to have the Paypal Donate button added to every Blogger post. (Please ask if you need help with this)

      1. Follow the directions (steps 1-16) as above to get your Paypal button code
      2. In Blogger go to Settings > Formatting
      3. Paste the Paypal Donate Button code into the Post Template box
      4. Save changes
      5. Click on New Post to see that the code will be automatically inserted at the foot of each new post. (you will need to be in Edit Html mode to see the code)
    2. To Add a Paypal Donate Button to Individual Blogger Posts
      1. Follow the directions (steps 1-16) as above to get your Paypal button code
      2. In Blogger go to the post you wish to insert the button code into
      3. Insert the button code taking care to change all instances of double quotes to single quotes
      4. Save post and publish as normal. (If you have trouble with the preview post button in the old editor in Blogger click on compose and then edit html)


    This Blogger tutorial has walked you through the steps needed to add a Paypal donate button to your Blogger blog (Blogspot blog) including how to configure your Paypal button at Paypal. I have covered adding the button as a sidebar gadget or footer gadget or alternatively added to Blogger posts. Have fun!


    The measure of life is not its duration, but its donation.


    Related Posts
    List of How Blog Works Tutorials for Blogger Blogs
    Tips for Adding Google Adsense to Blogger
    Better Placement of Google Adsense in Blogger
    Add Google Adsense to a Blogger Header
    Bloggers Guide to Google Adsense Myths
    Add Google Adsense or Banner Above Blogger Header
    Blogger Guide to Better Google Adsense Placement
    Make Money with Adsense Keywords and Blogger
    Make Money By Adding Banner Ads to Your Blogger Blog
    5 Easy Ways to Make Money from Blogger
    Add Chitika Ads to Blogger Blogspot
    Make Money Add an Amazon Widget to Blogger
    Add Amazon Product Links to Blogger Posts
    Read Full Post ...

    Sunday, August 21, 2011


    How to Fix Missing Quick Edit Pencil in Blogger Blogspot

    Is your custom Blogger template missing its quick edit pencil at the bottom of your Blogger posts (Blogspot posts)? Don't worry. In this Blogger tutorial I discuss how to show a quick edit pencil icon beneath Blogger posts if it is missing. This is a common Blogger problem among custom Blogger templates but fortunately it only takes a couple of minutes to fix.

    This Blogger tutorial follows on from my previous Blogspot tutorial about fixing missing Blogger icons. Check out how to show quick edit gadget wrench in Blogger (Blogspot) for help with this issue.

    In my previous Blogger tutorials I have also discussed how to fix many other common Blogger problems eg how to fix a missing embedded comment form in Blogger. Take a look at all my Blogger tutorials on how to fix common Blogger problems (Blogspot problems) here

    Fix Missing Quick Edit Pencil Blogger Blogspot
    The quick edit pencil is a nice Blogger feature that you would not want to be without. A click on this time saving Blogger icon gives you direct access to your Blogger posts without having to go through "Edit Posts"

    So if the free custom Blogger template you downloaded from the internet has no quick edit pencil displaying under your Blogger posts when viewing the actual published post then it can be fixed by taking the following the steps below:

    1. Login to Blogger
    2. Go to your Design > Page Elements
    3. Click on the Blog Posts edit button located in the bottom right hand corner of the widget

    4. A Configure Blog Posts window will pop up displaying a number of different features that can be turned on and off on your blog posts.
    5. Make sure that Show Quick Edit is checked. Tick the box and save if Show Quick Edit is not already checked


    6. Now navigate to an actual published post and check whether the quick edit pencil is now displaying in or around the footer of your blog post. Remember that you must be logged into Blogger to see the quick edit pencil - it is not displayed to your visitors

      If the pencil is there then that is the end of this Blogger tutorial. The pencil just needed to be enabled. So thank you for joining me today and if you have any other issues with Blogger be sure to check out my how to fix common problems in Blogger tutorials or take a look at the list of all the How Blog Works Blogger tutorials

      If the Blogger quick edit pencil is still missing it means that some important code has been omitted from your Blogger template and it will need to be added to get the quick edit pencil to show up
    7. Go to Design > Edit HTML
    8. Back up your template
    9. Check the Expand Widget Templates box by placing a tick in it
    10. Find the following line of code by holding down the CTRL key and F at the same time:


      <b:includable id='postQuickEdit' var='post'>

    11. Check whether the following code is under it:


      <span class='post-icons'>
      <!-- email post links -->
      <b:if cond='data:post.emailPostUrl'>
      <span class='item-action'>
      <a expr:href='data:post.emailPostUrl' expr:title='data:top.emailPostMsg'>
      <img alt='' class='icon-action' height='13' src='http://img1.blogblog.com/img/icon18_email.gif' width='18'/>
      </a>
      </span>
      </b:if>

      <!-- quickedit pencil -->
      <b:include data='post' name='postQuickEdit'/>
      </span> </div>


    12. If part or all of the code is missing copy and paste it above :


      <!-- quickedit pencil -->
      <b:include data='post' name='postQuickEdit'/>


    13. Save changes to your Blogger template
    14. Go to an individual published post page and see your new quick edit pencil displayed under your Blogger post

    Tips and Troubleshooting
    If you want to change the Blogger quick pencil icon you can by changing the image. Simply replace the image as depicted in red with the URL address of your own image. If your image is a different size you may have to change the width and height as shown in blue for the image to display correctly


    <span class='post-icons'>
    <!-- email post links -->
    <b:if cond='data:post.emailPostUrl'>
    <span class='item-action'>
    <a expr:href='data:post.emailPostUrl' expr:title='data:top.emailPostMsg'>
    <img alt='' class='icon-action' height='13' src='http://img1.blogblog.com/img/icon18_email.gif' width='18'/>
    </a>
    </span>
    </b:if>

    <!-- quickedit pencil -->
    <b:include data='post' name='postQuickEdit'/>
    </span> </div>


    In this Blogger tutorial (Blogspot tutorial) I have shown you how to fix a missing Blogger quick edit pencil that is not showing. I have demonstrated how to enable the quick edit pencil in Blogger via Page Elements and I have provided you with the missing code in the event that the quick edit pencil code is missing from your custom Blogger template.

    Please let me know if this tutorial has been useful for you by leaving your comments and opinions below.


    Related Articles
    List of How Blog Works Tutorials for Blogger Blogs
    How to Show a Quick Edit Gadget Wrench in Blogger (Blogspot)
    How to Fix a Missing Embedded Comment Form in Blogger
    How to Fix Common Problems in Blogger
    Read Full Post ...