Wednesday, August 31, 2011


Add Simple Image Slider to Blogger

Today's tutorial will teach you how to add a very simple image slider to the sidebar or content area of your Blogger Blogspot blog. The image slider will enable you to show off your images to readers and makes a nice addition to a personal blog. Each scrolled image is linked to the related post so that readers can find the posts they are interested in very easily. When the reader hovers over the image the slider stops and resumes again when the mouse is removed.

This slider is so simple you will be able to have it up and running in about 5 minutes. No change to the template is required making it a breeze to install. Even if you are very new to Blogger and a beginner I will show you just how easy it is to add an image slider to your Blogger blog.

How To Add a Very Simple Image Slider to a Blogger Sidebar
(note this code will scroll the image from bottom to top)

1. Login to Blogger if not already logged in

2. Navigate to Layout > Page Elements

3. Click on Add a Gadget in Blogger sidebar

4. Select the HTML/Javascript widget from the list of available gadgets

5. Paste the following code into the content box of the gadget


6. Add a title to the widget if you wish

7. Substitute the url of your blog posts, the description of your image, the url of the image, and the title of the image for each image you wish to display. For example:


To find the URL of your blog post go to the individual post page and copy the url from the address bar in your browser.

To find the URL of the your image. Upload your image to a blogger post and copy the address enclosed in src=" " tags.

8. Save the gadget

9. Use the drag and drop feature to position the new widget in the sidebar

10. Click on save to save your changes

11. View your new widget in the sidebar of your blog

Tips and Troubleshooting
  • To change direction of the slider
    Please note that this code will scroll the image from bottom to top. If you would like it to scroll in the reverse direction all you need do is change the direction in the code from "up" to "down". Or alternatively you can scroll from left to right by setting "right" and right to left by setting "left"
  • To increase the size of the images
    To increase or decrease the size of the image displayed simply adjust the width and height parameters to suit your needs
  • To add more images
    To add more images to the slider add the following to the code before </marquee>


  • To adjust scroll speed
    Scroll speed is set to 5 by default but any number can be set between 1 and 20 with "1" being the slowest and "20" being very fast indeed.

In today's tutorial I have shown you how to add a very simple image slider to your Blogger Blogspot blog to show off the images on your blog. There are a number of other image and content sliders and image slide carousels that can be added to Blogger and I will be writing about some of these in my upcoming posts.


Related Articles
List of How Blog Works Tutorials for Blogger Blogs
Read Full Post ...

Tuesday, August 30, 2011


Add Printer Button or Link to Blogger Blogspot

Today's article will show you how to add a print button or printer link to your Blogger Blogspot blog. The facility to print a hard copy of a post may be important to some visitors especially if you are like me and publish lengthy posts. Adding a printer button or link will add to your blog's functionality and user friendliness.

The reason I am writing this article is in response to a reader who asked me how to print out posts without the sidebar showing up. All the suggested buttons and links print out the post only and not the sidebar, header or footer.

This tutorial involves changing the template code but is not difficult as long as you follow these step by step instructions.

How to Add a Custom Print Button to Your Blogger Blogspot Blog
The following instructions will place a printer button on each individual page of your blog below the post. Only the blog article itself will be printed along with any comments. The sidebar will not be printed.

Example of the printer button to be added:
1. Log in to Blogger if not already logged in

2. Navigate to Layout > Edit HTML

3. Back up your template by downloading full template to your computer

4. Check Expand Widgets Template

5. Bring up the search toolbar by using CTRL + F

6. Find this line by typing it into the search box:


<p><data:post.body/></p>


7. Now replace that line with the following code block:


<!-- Add Printer Button by http://howblogworks.blogspot.com/-->
<span class='noprint'><p><data:post.body/></p></span>
<b:if cond='data:blog.pageType == &quot;item&quot;'>
<a href='javascript:window.print()'>
<img src='http://i1020.photobucket.com/albums/af326/bookwise77/printer-button.gif'/></a></b:if>
<!-- End Add Printer Button by http://
howblogworks.blogspot.com/-->


8. Click on Save Template to save changes

9. Click View Blog to see your button in action

Note: If you want to change the printer icon to your own icon upload your image to a photo storage service like Photobucket and note the URL address of the icon. Now substitute the URL address of the existing image for your image by changing the line beginning with <img src='
Change printer icon to this alternative printer icon
So to change the printer image to another printer image the code would look like:


<!-- Add Printer Button by http://
howblogworks.blogspot.com/-->
<span class='noprint'><p><data:post.body/></p></span>
<b:if cond='data:blog.pageType == &quot;item&quot;'>
<a href='javascript:window.print()'><img src='http://i1020.photobucket.com/albums/af326/bookwise77/printer-button-2.gif'/></a></b:if>
<!-- End Add Printer Button by http://
howblogworks.blogspot.com/-->


How to Add a Printer Link to a Blogger Blogspot Blog
You may not want a button and prefer to add a printer link instead. To do this you would follow steps 1 to 6 and then insert the following code instead of the code contained in step 7


<!-- Add Printer Link by http://
howblogworks.blogspot.com/-->
<p><span class='noprint'><data:post.body/></p></span>
<b:if cond='data:blog.pageType == &quot;item&quot;'>
<a href='javascript:window.print()'>Print this post</a>
</b:if>
<!-- End Add Printer Link by http://
howblogworks.blogspot.com/-->


Save the changes to your template and then navigate to an individual post to see your link at the bottom of the post.


How To Add a Combination of Printer Button and Link
If you would like to display a printer button along with a link follow steps 1 to 6 and then insert the following code instead of the code contained in step 7


<!-- Add Combined Printer Button and link by http://
howblogworks.blogspot.com/-->
<span class='noprint'><p><data:post.body/></p></span>
<b:if cond='data:blog.pageType == &quot;item&quot;'>
<span style='background: url(http://i1020.photobucket.com/albums/af326/bookwise77/printer-button.gif) left no-repeat; padding-left: 28px;'>
<a href='javascript:window.print()'>Print this post</a></span>
</b:if>
<!-- End Add Combined Printer Button and link by http://
howblogworks.blogspot.com/-->


In this article I have shown you how to add a print button, a print link and a combined button and link to the bottom of your Blogger Blogspot posts. Enjoy!


Related Articles
List of How Blog Works Tutorials for Blogger Blogs
Read Full Post ...


Add Outbrain Ratings Widget to Blogger

Outbrain provides a free and very stylish content recommendations and ratings widget which can be easily added to your Blogger Blogspot blog. In this tutorial I will discuss the benefits of Outbrain and also provide a step by step walkthrough of the process of adding an Outbrain widget to your Blogger blog and your Feedburner FeedFlare if you have burned your blog feed at Feedburner.


Benefits of Adding Outbrain to Your Blogger Blog
By adding an Outbrain content and ratings widget to your Blogger blog you will encourage visitors to record their reactions to a post they have just read. Along with features likes polls this is another good method of encouraging visitors to interact with your blog. Outbrain also makes it possible to display your most popular posts within the widget. In addition the Outbrain ratings widget may help drive more traffic to your blog when your visitors use the Recommended Posts feature which is embedded in the widget. By the same token it may also mean that the traffic doesn't stay long as visitors will be wooed away by recommended links so you will have to weigh up the benefits versus the costs for yourself. Outbrain also provides reports on widget activity

How to Add an Outbrain Ratings Widget to Blogger
1. Register at Outbrain. This is a simple sign up process that requires you to click on a confirmation email once you have requested sign up and filled out a simple form.

2. Once registered click on Get the Widget from the footer menu

3. Choose Blogger as your Blogging platform

4. Select the language of your widget if other than English which is the default

5. Click on Get the Widget button and Outbrain will automatically refer you to Blogger in a new window. Sign in to Blogger in the new browser window. Don't close the Outbrain window as we will be returning here.

6. Choose your blog from the drop down menu and click on the Add Widget button.

7. Navigate to Layout > Page Elements and reposition if necessary your new widget which will now be appearing in the sidebar of your blog. Save any changes you make.

8. Return to Outbrain in your open browser window and click on the click here link to verify your blog. You will receive a message verifying that you have claimed your blog

9. Click on the View Blog link in the menu tab section and view your new Outbrain widget in action.

Note that once your readers start to rate your posts by clicking on them the stars will become yellow. 5 yellow stars is an excellent rating


Customizing Your Outbrain Ratings Widget
1. Return to the Outbrain window in your browser

2. Navigate to Manage Posts using the Sidebar Menu on the lefthand side

3. In the list of blogs you will see your blog listed. Click on the settings link

4. If you leave the default setting you will see recommended links appearing as pictured above in #9. If you don't want any recommendations you can set this to no.

5. If you have set up your blog with the idea of earning a little extra money you may choose to turn off sponsored recommendations. If you leave the radio button set to yes any proceeds from the sponsored links clicked on will go to charity. The charity sponsored can be selected via the drop down menu

6. Outbrain will show the most popular posts in the sidebar of your blog if this feature is enabled. To enable popular posts select the enable radio button.

7. Click on the Submit button


Adding Outbrain to Your Feedburner FeedFlare
If you already have a FeedFlare appearing at the footer of your burned Feedburner feed of your blog you can easily add Outbrain too. Check out my article on adding a Feedburner FeedFlare to Blogger if you are not sure what a FeedFlare is or how to add one to Blogger.

Go to Feedburner and choose your blog from the list of My Feeds. Select the Optimize tab and then FeedFlare from the lefthand sidebar menu. In the Personal FeedFlare section paste the following code (URL) into the text box:

http://widgets.outbrain.com/FeedFlareUnit.xml


and click on the Add New Flare button. Click on Save. Your readers will now be able to rate your blog straight from your Blogger feed.

Outbrain Troubleshooting Tips for Blogger Installation
  • When you install Outbrain on your blog resist the temptation to rate one of your posts as this vote can't be deleted once it is cast. Even when I tried uninstalling and reinstalling the widget the vote did not clear.
  • The Popular Posts feature takes a while to show any posts as it needs at least 2 visits before it will start rating the post
  • If you have other problems with Outbrain try this active Outbrain support forum for answers

In this tutorial you have learned how to install the Outbrain Ratings widget on your Blogger Blogspot blog and customize it. Also some of the benefits of the Outbrain widget were discussed along with a couple of Outbrain installation troubleshooting tips. If you have a moment let me know how you get on installing this widget. Don't forget to bookmark this post for easy reference.

Related Articles
Add a Feedburner FeedFlare to Blogger Feed
Read Full Post ...


Hide Remove Navbar from a Blogger Blog

The more professional you want your site to look the more you are likely to want to remove the navbar from showing above the header of your Blogger Blogspot blog. Removing or actually hiding the navbar is very easy to do as it only requires a small tweak to your template. This tutorial is suitable for bloggers at all levels but is written with new bloggers and the beginner blogger in mind and provides step by step instructions to guide you through the process of hiding the navbar from your Blogger blog.

How Useful is the Navbar of a Blogger Blog?
Blogger provides the facility to search your blog by entering keywords or a search phrase into the Search Blog box. This is a useful feature and if you remove the Blogger navbar you will lose the search facility from your blog. If you are using a custom template with a search box already built in this won't be a problem but if you are using one of the Blogger templates deleting the navbar will leave your blog without a search function. Another useful feature of the navbar is the follow button which encourages bloggers to start following your blog.

The random blog feature is not particularly useful unless you have a lot of time on your hands and just feel like a browse. For most serious bloggers looking to create a professional look and feel to their blog the navbar can be a distraction. And let's face it you've worked hard enough getting the traffic to your site right? without encouraging them to leave it too quickly.


The other main feature of the navbar is the ability to navigate back to your layout menu or posts quickly no matter where you are in your blog when signed in. Personally I like this feature and use it a lot. Its particularly good if you are on a page other than your homepage and want to quickly go to another of your blogs as you can get there in 2 clicks. The same goes if you want to visit some other area of your Google account such as Google Analytics or Google Webmaster Tools. You can get there in 2 clicks too when the navbar is enabled.


Blogger have now created another reason to think twice before you remove the Blogger Navbar as they have recently added a Share button so that readers can quickly add your blog to their Twitter, Facebook and Google Reader accounts. The facility to Email your posts is also available when using the Blogger Share button from an individual post page.


To navigate with the navbar disabled you simply have to double click the back button in your browser to navigate away from the home page of your blog. If you are in another part of your blog then it can be annoying not to have the navbar functionality. The way I have gotten around it is to usually disable the navbar and click on blogger.com in the google search box on the toolbar of my browser. Provided I am signed in to Blogger this will take me straight to the dashboard.

Overall my view is that what you lose on convenience you gain on professionalism. Losing the navbar is a sacrifice but it is a small price to pay for a much improved look to your blog.


How to Get Rid of the Navbar on your Blogger Blog

1. Login to Blogger and navigate to Layout > Edit HTML> Expand Widget Templates.

2. Find the Template Credit Section

/* Variable definitions
  ====================


3. Insert the following code directly above this code(/* Variable definitions). Select the code and right click to copy to the clipboard of your computer. Right click to paste into your template:


#navbar-iframe {
   display: none !important;
}


or this code, which ever would you like, both code works fine...


#navbar { 
height: 0px;
visibility: hidden;
display: none;
}


4. Click on the Save Template button

5. Click on View Blog to view you blog without the navbar


Troubleshooting
If you later decide that you are not happy with the missing navbar all you need do to reinstate it is to remove the code you inserted. This works as the code you inserted actually only masks the navbar rather than deletes it.

In this tutorial you have learned about some of the advantages and disadvantages of the Blogger navbar and how to hide, disable, remove or delete the navbar in order to promote a more professional looking blog.

Related Articles
List of How Blog Works Blogger Tutorials
Read Full Post ...


Add a Horizontal Links Menu to Blogger

In this Blogger tutorial you will learn how to place a horizontal row of menu items above your first post in your Blogger blog (Blogspot blog). This process requires adding both a small amount of code to your Blogger template and a HTML/Javascript widget to your layout. This tutorial is suitable for Blogger (Blogspot) webmasters of all abilities.

Navigating a website using a horizontal menu is a traditional way to get around. On this blog for example you can see that I have tweaked Blogger to create a row of horizontal text links for easier navigation of popular pages and labels. Follow the step by step instructions below and you will be able to add a customized menu of horizontal links to your Blogspot blog as seen here.


If you are using a default template you can add a menu by using the Blogger pages feature. This tutorial shows you how to manually add a top menu and add links to it.


Steps to Add a Horizontal Links Menu Above Blog Posts

1. In Blogger navigate to Design > Edit HTML

2. Locate the header style sheet section which will usually be notated as

/* Blog Header */


If you can't find this line then locate the following area of your stylesheet using CTRL + F and place before these lines


]]></b:skin>
</head>


3. Copy and paste the following CSS code into your template under the header section taking care not to overwrite any existing code and to include the end bracket. It is probably best to paste into the bottom of the header style sheet section so that it is easier to change the code if necessary.


/* Blog Header */

#newnavbar ul li{
font-size:100%;
list-style-type: none;
display:inline;
padding:0px;
margin:10px;
border:0px solid;
}

#newnavbar li a{
color:#335577;
}

#newnavbar li a:visited {
color: #990066;
}

#newnavbar li a:hover {
color: #99FFFF;
background: #CCFFFF;
}


4. Click on Save Template

Note: You will need to change the colors to suit the color scheme of your blog. Change every instance of color and the background color to customize to your own requirements

5. Navigate to Design > Page Elements

6. Click on Add a Gadget in the Blog Posts area. If you don't have this option already set on your template you can enable it by locating the following code and setting showaddelement to yes.


<div id='main-wrapper'>
<b:section class="'main'" id="'main'" showaddelement="'yes'>


7. Select HTML/Javascript from the menu

8. Copy and Paste the following code into the Content box. There is no need to add a title. You can alter the code to suit your own needs depending on the links required.


<div id='newnavbar'>
<ul>
<a href="Home Page URL">Home</a></li>
<li><a href="URL of Your Blogger Profile Page">About Me</a></li>
<li><a href="URL of Any Label You Choose">Label of Your Choice</a></li>
</ul></div>


To add a link to a label, as I did on this site, in this case Blogger Tutorials, you would enter the following:

<a href="http://howblogworks.blogspot.com/search/label/Blogger%20Tutorials">Blogger Tutorials</a>


9. Your script should be above your posts and any advertising or banners. If it is not drag it to the top position


10. Click on Save

11. Click on View Blog to see your new menu in action


Steps to Add a Horizontal Link Menu to Header

If you prefer you can add your horizontal link menu to your header instead of directly above your first post. In this case follow the steps below:

1. Follow steps 1 to 4 as for menu above first post

2. Navigate to Design > Edit HTML

3. No need to check Expand Widget Templates

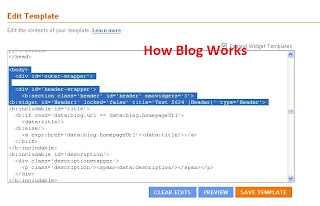
4. Locate the beginning of the body section which will be tagged as <body>

5. Find the line: <b:section class='header' id='header' maxwidgets='1'>

6. Change maxwidgets from 1 to 3.


7. Click on Save Template

8. Navigate to Design > Page Elements

9. Click on Add a Gadget in the Header area.

10.Select HTML/Javascript from the menu

11.Copy and Paste the following code into the Content box. There is no need to add a title. You can alter the code to suit your own needs depending on the links required.


<div id='newnavbar'>
<ul>
<a href="Home Page URL">Home</a></li>
<li><a href="URL of Your Blogger Profile Page">About Me</a></li>
<li><a href="URL of Any Label You Choose">Label of Your Choice</a></li>
</ul></div>


To add a link to a label, as I did on this site, in this case Blogger Tutorials, you would enter the following:


<a href="http://howblogworks.blogspot.com/search/label/Blogger%20Tutorials">Blogger Tutorials</a>


12. Click on Save Template

13. Click on View Blog to view the new horizontal menu in your header

Tips and Troubleshooting
To add this horizontal navigation menu to the area below the header do the following:

  1. Login in to Blogger
  2. Navigate to Design > Edit HTML
  3. Find the following lines of code:


    <div id='crosscol-wrapper' style='text-align:center'>
    <b:section class='crosscol' id='crosscol' showaddelement='no'/>
    </div>

  4. Change showaddelement to yes


    <div id='crosscol-wrapper' style='text-align:center'>
    <b:section class='crosscol' id='crosscol' showaddelement='yes'/>
    </div>

  5. To left align the menu change text-align:center to text-align:left
  6. Paste the code in step 3 of Steps to Add a Horizontal Link Menu Above First Post directly before the following:


    ]]></b:skin>
    </head>

  7. Save Template
  8. Navigate to Design > Page Elements
  9. Click on Add a Gadget in the new area enabled below header
  10. Select HTML/Javascript from the menu
  11. Copy and paste the code in step 8 of Steps to Add a Horizontal Link Menu Above First Post into the content area of the gadget and change links to your own requirements
  12. Save gadget and select View Blog to see your menu in action

This Blogger tutorial has shown you how to add a horizontal links navigation menu to a Blogger blog (Blogspot blog) either in the header itself, directly above the very first post or in the area between the header and first post. In adding a navigation menu to your blog you improve the user friendliness of your blog by helping your visitors find information and posts more readily. Any questions please don't hesitate to ask.

Related Posts
List of How Blog Works Tutorials for Blogger Blogs
Read Full Post ...


Add a Welcome Message to Blogger Blog

Would you like to welcome visitors to your Blogger Blogspot blog with a simple welcome message? In this tutorial I will show you how to add a short welcome message to your Blogger sidebar using the text gadget. This tutorial is aimed at beginner bloggers and those new to Blogger.

How to Add a Welcome Message to the Blogger Sidebar

1. Login to Blogger if you are not already signed in

2. From the Dashboard select the link to your blog. If you have more than one blog you will need to choose from a list of your blogs displayed on the dashboard

3. Navigate to the Layout > Page Elements page by clicking on the Layout tab and then the Page Elements link.

4. Click on Add a Gadget in the sidebar of your blog

5. Choose the Text gadget from the list.

6. Paste the following into the content box of the gadget:


To Your Blog Name. Add your own welcome message here. Write something that will tell readers about your blog


7. Bold Your Blog Name by highlighting the Your Blog Name text and selecting b from the formatting options

8. Type the word Welcome into the Title box

9. Click on the Save button to save the gadget

10. Click on the Save button in your template to save your changes

11. Click on View Blog and admire your new welcome message which will appear at the top of your blog's sidebar

12. Now you have an idea of what it looks like click on the back button of your browser to return you to the Page Elements screen


To Edit the Content of the Text Gadget
Select Edit by clicking on the edit link of the gadget in the sidebar and changing the contents or title and saving the changes

To Remove the Gadget
Select Edit by clicking on the edit link and choosing the remove button

In this tutorial for newbies and beginner bloggers I have outlined the steps necessary to add a text gadget to the sidebar of your Blogger Blogspot blog. By way of example I have shown you how to add a welcome message to your blog sidebar
Read Full Post ...


Avoid 6 Common Blogger Mistakes

If you want your Blogger blog to sizzle and really take off there are some pretty important blogging pitfalls that you need to avoid. In today's article I will be talking about 6 of the most common mistakes new bloggers make on their Blogger Blogspot blog and how to avoid them.


1. Avoid Poor Content
I can't emphasize enough that the standard of your content will make or break your blog. Poor content = few return visitors. Good content on the other hand will attract visitors and keep them coming back to check out what's new.

Successful bloggers write clearly, know their subject and develop their own unique voice. A conversational style is often recommended but I suggest just write naturally and that naturalness will shine through.

Post quality well researched content that is interesting and topical. To do this you need to know your audience. Who are your readers? Do you know? If you don't know your target audience it will be hard to put yourself in their shoes which is exactly what you need to be able to do when you sit down to write a post. Ask yourself what are my readers looking for that would make them visit my site and read my post. Are they looking to be entertained, informed or a bit of both? Sign up for visitor tracking such as Google Analytics if you aren't already so you can get an idea of your visitor base. For help with implementing Google Analytics please read my post on adding Google Analytics to your Blogger blog.


2. Avoid Hopeless Headlines
I've seen some pretty hopeless headlines that don't give me enough of a clue about what a post is about to entice me into reading the article. If you want to attract readers to your site you need to grab them. That means putting some thought into crafting headlines that have punch. Remember your headline needs to reel your visitors in so make sure it is well thought out and punchy. Your headlines have to stand out to be noticed as so many people read headlines in RSS feeds.

Another important consideration when deciding on a headline is SEO. Consider what your readers might search under to find your post. "Blogging pitfalls" and "common blogging mistakes" are more likely keyword search phrases than "bad blogging practices." So knowing your keywords will help you craft headlines that are keyword rich.

3. Avoid Posting Too Infrequently
Once a visitor has found your site you want them to keep coming back. One way to ensure repeat traffic is to post frquently. Many new bloggers start a blog but find it hard to maintain a posting routine that is frequent enough to retain traffic.

Just the other day I had someone comment that one of the reasons why they liked my blog was the frequency at which I post. I try to post a new article every second or third day if possible. I usually am working on lots of other articles in the background so that I might have two nearly finished and half a dozen or so at various stages of completion. Using this system I have some flexibility and a cushion if anything comes up to interrupt my posting schedule.

Whatever you do don't make the mistake of posting just for the sake of posting otherwise your readers will see through this and you will lose readership.


4. Lack of Overall Focus - Trying to Paint the Whole Wall
So many new bloggers start their site without a clear focus. What kind of focus you may ask? Well making money is not enough of a focus. I am talking about identifying your niche and sticking to it. If you try and paint the whole wall your visitors will be confused about what your blog is about and you will very likely lose traffic rather than gain it.

Having a focus is important. On Blog Know How for instance, I concentrate on helping webmasters of Blogger blogs get the most out of their blog. I particularly aim my site at the new blogger and provide detailed step by step walkthroughs with them in mind. At the same time, however, I cater for all Blogger webmasters who access my blog. What I don't do though is go outside the theme of Blogger by writing about blogging in general. Instead I write articles that may be general in nature but are tailored to Blogger webmasters.

Yes I could get more traffic perhaps if I widened the scope of my articles to include Wordpress or blogging in general put what would then make my blog stand out from a whole heap of other blogs giving advice on blogging? Having a niche earns me traffic that is focused. Site visitors come with the goal of becoming more informed about using Blogger. If they go away having learnt more than when they arrived my site will have done its job and I may have just found myself a repeat visitor.


5. Avoid Too Much Advertising on Your Blog
New blogs need to build traffic and too much advertising can be a big deterrent in
achieving this goal. When your site is very new it doesn't pay to have too much advertising at all. Err on the side of less advertising rather than more. Bear in mind of course that Rome wasn't built in a day and your site won't be either. Have faith that your traffic will build and you can gradually introduce more advertising like Google Adsense as visitor numbers increase.

6. Avoid Too Many Social Bookmarking Buttons
Too many social bookmarking buttons can clutter up your blog and slow it down. Many people still don't know too much about social bookmarking so avoid the temptation to overuse these icons. Rather than use a whole bunch of popular icons like Digg and Technorati which can lead to a cluttered look and feel I use a single consolidated button like Add This. Share This is another popular button for sharing your posts.

To install a social bookmarking button on your Blogger blog follow the step by step instructions contained in my article on Add This

This article has discussed 6 common mistakes new bloggers make when developing a new Blogger Blogspot blog and given suggestions on how to avoid them.as visitor numbers increase.
Read Full Post ...


Add Twitter Badge Button to Blogger

In this tutorial you will learn how to add a Twitter badge aka Twitter button to your Blogger Blogspot blog to link your blog to your Twitter account. By adding a Twitter button you will give your readers the option to follow your blog on Twitter.

Display a Twitter Icon in the Sidebar of Your Blogger Blog
If you look at the top of the right sidebar you will notice that I have placed a Twitter icon with a link to my Twitter profile. Adding the Twitter badge and link is not difficult and requires no change to the template. We will simply be adding a gadget to the sidebar. I have assumed no knowledge of Blogger and widgets so that absolute Blogger beginners can follow this tutorial.


1. Login to Blogger if not already logged in

2. Navigate to Layout > Page Elements

3. Click on Add a Gadget in the sidebar or other location eg the footer if you prefer

4. Select HTML/Javascript from the list of available gadgets

5. Paste the following code into the content box depending on your choice of button:


<a href="http://twitter.com/Your Profile"><img width="133" src="https://blogger.googleusercontent.com/img/b/R29vZ2xl/AVvXsEgaycIs3z54qnAP9GZB3jeo_Jlydx-W1rGKQOuve3N-9plgSlzWuhAQP_6_3RE15BCoXNQcEl-BSVOJz7ow2BaA1bUsUo4ViDoGNLgdsgon2hGHjN8ce1tqaUDG3b29IrFfKa7NXVbwGPk/s200/twitter-bar.gif" height="34" title="Follow Your Blog Name on Twitter"/></a><br/>


<a href="http://twitter.com/Your Profile"><img width="199" src="https://blogger.googleusercontent.com/img/b/R29vZ2xl/AVvXsEgL9-zCQeA51tU5wsVWIUx8t-jpCmQZ3aKPvTvEmVzbPl5FjIP4IeaIGyxzn0HCbFVVMKEJYVmJIhyUpl-IbDwpYYWRO1h4Ug9dxFNzvYsn_2POIjXj_scHwOQ3toKy3uGSryd2IbxFQNk/s200/twitter-35a.png" height="42" title="Follow Your Blog Name on Twitter"/></a><br/>


<a href="http://twitter.com/Your Profile"><img width="191" src="https://blogger.googleusercontent.com/img/b/R29vZ2xl/AVvXsEi66o2HjiJVxOLELDxSDqdqCDPCDfiHDnm_z6oMm-IKiBzUJL5LBh-Z8QBuNBpmsy8B416rfQwcjPdN0eR4UGUT8nLtd8mavuvGbX9XnVQJtJY6iZVmAm76DvjCWWboxNXocTkxc2DlL9M/s200/twitter-32a.png" height="58" title="Follow Your Blog Name on Twitter"/></a><br/>


6. Change Your Profile to your own Twitter profile. For example:


http://twitter.com/YourProfile

to

http://twitter.com/YourName


7. Substitute your blog name in the title for your own blog name


title="Follow Your Blog Name on Twitter"

to

title="Follow How Blog Works on Twitter"


8. Click on Save.

9. Move your new Twitter widget to the desired location on your sidebar using drap and drop

10. Click on View Blog to admire your new Twitter button


In this tutorial you have learned how to add a Twitter button, badge, icon to your Blogger Blogspot blog so that readers can sign up to follow you on Twitter. I have supplied you with a choice of three different buttons to get you started. For more Twitter buttons try these free Twitter vector icons or these free Twitter graphics or just type Twitter icons into your favorite search engine

Related Articles
List of How Blog Works Tutorials for Blogger Blogs
Add Twitter Followers Counter to Blogger
Read Full Post ...


Add a Twitter Followers Counter to Blogger

In this tutorial you will learn how to place a Twitter Follower Counter on your Blogger Blogspot blog to display the number of followers you have on Twitter. A Twitter count button will encourage readers to follow you on Twitter much in the same way as putting a Feedburner subscriber counter on your blog will encourage new subscribers.

How To Place a Twitter Followers Counter on Blogger

1. Login to Blogger if not already logged in

2. Navigate to Layout > Page Elements

3. Click on the link to Add a Gadget to the sidebar or footer

4. Select HTML/Javascript from the list of gadgets

5. Paste the following script into the widget content box depending on the button your prefer:


Standard Button
<script type="text/javascript" language="javascript" src="http://twittercounter.com/embed/?username=yourTwitterusername"></script>


Black Button
<script type="text/javascript" language="javascript" src="http://twittercounter.com/embed/?username=yourTwitterusername&style=black"></script>


Big Bird Button
<script type="text/javascript" language="javascript" src="http://twittercounter.com/embed/?username=yourTwitterusername&style=bird"></script>


If you would like to view more Twitter Counter badges you will find them at http://twittercounter.com/pages/buttons/

6. Replace the username with your own Twitter username. For example my username is blogwizz so I would enter username=blogwizz. If you are not already a member of Twitter sign up is a breeze

7. Enter a title for the widget if you wish

8. Click Save

9. Move your new widget into position on your sidebar by using Blogger's drag and drop feature

10. Click the View Blog link to admire your new Twitter Followers Counter


In this tutorial you have learned how to put a Twitter Followers Counter on your Blogger Blogspot blog so that you can display an accurate count of your Twitter followers. This will encourage other readers to begin following you on Twitter.


Related Articles
List of How Blog Works Tutorials for Blogger Blogs
Read Full Post ...


Tips to Add a Digg Button to Blogger Blogspot

Today's article discusses where to place a digg.com button on your Blogspot Blogger blog and shows you how to add an integrated digg button to your blog. The button allows your blog's visitors to digg posts from your blog and submit those articles to Digg.

What is Digg.com?
Digg is a social content site where readers submit stories, videos and images. Depending on interest and popularity articles are commented on by members. You can encourage your readers to digg your stories by adding a Digg button to your Blogger blog. The button will display a real time count of the number of times your post has been dugg.


Why Add a Digg Button to My Blogger Blogspot Blog?
Why would I want to add more buttons to my blog you may be wondering. Well there are a number of reasons why getting on board with Digg will be helpful to you in growing your blog.

  • Digg is a ready source of traffic that can drive visitors to your blog and it is too important to overlook. When visitors digg your stories it will encourage new readers to visit your blog.
  • Posts that have been submitted to Digg appear in search engine results so your blog will receive exposure.
  • A digg button will encourage visitors to submit your blog's content including images and video to Digg. This will encourage others to comment and write about your post and possibly link to it.

What to Consider When Choosing to Add Digg to Your Blog
When adding a Digg button to your Blogger Blogspot blog there are some important considerations to think of before you get started. You will need to decide about:

  • The look of the button to place on your blog as Digg gives you the option of several sizes to choose from. The look and feel of your blog will dictate what button you decide on.
  • What pages your Digg button will display on. Do you want it on the home page as well as the post pages for instance? I strongly advise that you place any integrated button only on post pages otherwise you will find the loading time of your homepage will be noticeably reduced.
  • What position to place the button in on your blog. Under the post title, beside the first paragraph, below the post are all common locations for a Digg button. Placing a button near the top of your posts can be a good ideas as visitors will see it as the page loads because the button will be above the fold ie the area that visitors see without having to scroll down. If you have a bunch of social media buttons at the bottom of your posts already you might want to include your Digg button in this sequence.

Can I Digg My Own Blog Content?
Yes. You most certainly can digg your own Blogger posts as this will get you a listing in Digg.

How to Add a Digg Button to Blogger Blogspot Blog
I am going to show you how to manually change your Blogger Blogspot template to include your Digg button. While this is not a difficult tweak you will be changing your template. Make sure you take care not to overwrite any code. My suggestion as always is back up first by downloading your template before beginning the addition of this code.

To add a large Digg button to appear next to the first paragraph in your Blogger Blogspot posts:


1. Login to your Blogger blog if not already logged in

2. Navigate to Layout > Edit HTML

3. Back up your template by downloading full template as a precaution

4. Check the Expand Widgets Template box

5. Find this line of code using CTRL + F

<p><data:post.body/></p>


6. Paste the Following code above <p><data:post.body/></p>


<!--Digg.com Button-->
<b:if cond='data:blog.pageType == &quot;item&quot;'>
<div style='float:right; margin-left:10px;'>
<script type='text/javascript'>
digg_url=&quot;<data:post.url/>&quot;;
</script>
<script src='http://digg.com/tools/diggthis.js' type='text/javascript'/>
</div></b:if>
<!--end Digg.com Button-->


7. Click on the Save Template button

8. Click on View Blog link and navigate to an individual post page. You will see your new digg button is only visible on the post page.

Customizing Your Digg Button Tips and Troubleshooting


  • To have the Digg button display on all pages not just the individual post pages remove this line:


    <b:if cond='data:blog.pageType == &quot;item&quot;'>


  • To have the Digg button aligned to the left instead of the right change this line from:

    <div style='float:right; margin-left:10px;'>

    to:

    <div style='float:left; margin-left:10px;'>


  • To replace the large button with the compact button replace the code in Step 6 with:

    <!--Digg.com Button-->
    <b:if cond='data:blog.pageType == &quot;item&quot;'>
    <div style='float:right; margin-left:10px;'>
    <script type='text/javascript'>
    digg_url=&quot;<data:post.url/>&quot;;
    digg_skin=&quot;compact&quot;;
    </script>
    <script src='http://digg.com/tools/diggthis.js' type='text/javascript'/>
    </div></b:if>
    <!--end Digg.com Button-->


  • To change the background color of the button from white to your own desired color add this line:

    digg_bgcolor=&quot;#ff9900amp;quot;;

    below this line:

    digg_url=&quot;<data:post.url/>&quot;;


    Note: Change the value #ff9900 to whatever hex color you would like.


  • To move the Digg button to below the post content instead of at the top paste the following code:

    <!--Digg.com Button-->
    <b:if cond='data:blog.pageType == &quot;item&quot;'>
    <div style='float:right; margin-left:10px;'>
    <script type='text/javascript'>
    digg_url=&quot;<data:post.url/>&quot;;
    digg_skin=&quot;compact&quot;;
    </script>
    <script src='http://digg.com/tools/diggthis.js' type='text/javascript'/>
    </div></b:if>
    <!--end Digg.com Button-->

    to the end of the section of code beginning with this line

    <div class='post-footer-line post-footer-line-2'>

    If you have a third post footer line then place this code after that block of code.


    In this tutorial you have learned about what Digg is and the benefits of adding an integrated Digg button to your Blogger Blogspot Blog. You have also learned about different placement options for your Digg button and been given step by step instructions on how to customize the Digg button to suit the needs of your blog.


    Related Articles
    List of How Blog Works Tutorials for Blogger Blogs
    Add a Social Bookmarking Button to Blogger

  • Read Full Post ...

    Monday, August 29, 2011


    Free Social Bookmark Buttons for Blogger

    One way to get your blog to grow is add social bookmarking buttons to your Blogger Blogspot blog. In an earlier article I wrote about the simplest way to place social media on a Blogger blog - that is to add an all-in-one Add This social bookmarking button.

    However, as one size doesn't fit all situations there may be lots of times when you would prefer to add individual social bookmark buttons to your Blogger blog. That's why I have put together this list of useful free social bookmarking button sets. All are free to use on a personal blog and most have no restrictions for commercial use either but please do double check the license when you download them if you want to use the buttons commercially.

    Best Sources of Social Bookmarking Buttons for Blogger Blogspot

    128 Completely Free Icons Set
    128 Icons available in 48×48px. Includes Social Media Icons such as: Design Float, Digg, Delicious, Furl, Technorati, Flickr, Stumble Upon, Twitter & more…

    Web 2.0 Icons (23 icons)
    23 freeware “iPhone-like” icons sized from 512X512 to 16X16 pixels. Includes Blinklist, BlogMarks, Delicious, Digg, FaceBook, Favorite, Feeds, FeedBurner, Flickr, Furl, Google Magnolia, Misterwong, Myspace, Newsvine, Netvibes, Reddit, Simpy, Stumbleupon, Technorati, Twitter, Youtube.

    Socialize (12 icons)
    12 high quality, free icons in these sizes: 16x16px, 32x32px, 48x48px, 64x64px and 128x128px and 32-bit transparency PNG file format.


    Handycons (12 icons)
    Handycons is a free, hand drawn social media icon set containing 12 icons. Package contains icons for del.icio.us, Digg, Mixx, DesignBump, StumbleUpon, Reddit, Developer Zone, DesignFloat, Technorati, Twitter and RSS feed & Email icon, of course. All icons are available in four sizes: 16x16, 24x24, 32x32 and 48x48 pixels.


    Handycons 2 (20 icons)
    20 more hand drawn icons following on from the first Handycons set. Package contains Facebook, Blinklist, Feedburner, Flickr, FriendFeed, Furl, Gmail, Google, Heart icon, Last FM, Linked IN, Magnolia, Newsvine, PayPal, Skype, Sphinn, Twitter, Vimeo, Yahoo and You Tube icons. All icons come in four sizes: 16x16, 32x32, 64x64 and 12x128px.


    Social Media Icons (26 icons)
    26 clean looking free social media icons available for personal or commercial use.

    Aquaticus Social (30 icons)
    30 Web 2.0 social media icons in 4 sizes. Free to use on blogs. List includes popular icons like: Blogger, Delicious, Digg, Facebook, flickr, furl, Google, Ma.gnolia, Mixx, MySpace, NetVibes, NewsVine, Reddit, StumbleUpon, Technorati, Twitter, Yahoo!
    Aquaticus.Social by ~jwloh on deviantART


    Social Me Icons (30 Icons)
    30 free iPhone-inspired icons that can be used on blogs and websites without restriction. 4 sizes up to 60x60px, 48x48px, 24x24px, 16x16px. List includes popular icons like: Blogger, Delicious, Digg, Facebook, flickr, furl, Google, Ma.gnolia, Mixx, MySpace, NetVibes, NewsVine, Reddit, StumbleUpon, Technorati, Twitter, Yahoo!
    Social.me by ~jwloh on deviantART


    Social Bookmark Iconset Pt I


    Social Bookmark Iconset Pt II


    Ok so that's my current list of some of the best free social bookmark icons available on the net suitable for a Blogger Blogspot blog. This is a pretty extensive list to get you started but I will add more as time goes on and I come across other great sets. If you find what you are looking for here please let me know and if not I would be interested in that too.


    Related Articles
    List of How Blog Works Tutorials for Blogger Blogs
    Add a Social Bookmarking Button to Blogger
    Read Full Post ...


    Add Social Bookmark Buttons to Blogger

    In today's Blogger tutorial (Blogspot tutorial) you will learn how to place social bookmark buttons in the sidebar, footer and below each post in a Blogger Blogspot blog. This is a social bookmarking script for individual buttons or icons rather than the Add This all-in-one solution that I have previously written about. These free social bookmark buttons will encourage social bookmarking SEO by having your visitors save their favorite content and hopefully share it on social media sites such as Digg, Technorati and Stumble Upon thereby helping to grow your blog traffic.

    I personally prefer to use an Add This social bookmark button because individual buttons can create a cluttered busy look. However, I also realize that the Add This social bookmarking button is not necessarily that recognizable to visitors who may have otherwise bookmarked your pages had the button been more recognizable to them.


    How to Add Social Bookmark Buttons to Blogger Sidebar or Footer

    1. Login to Blogger if not already logged in

    2. Navigate to Page Layout > Page Elements

    3. Click on Add Gadget in Sidebar or Footer

    4. Select HTML/Javascript gadget from the list of available gadgets

    5. Copy and paste the social bookmarking button code into the content box that is available for free download below. Note you will only be able to add the small social bookmarking buttons to the sidebar unless you only want a few of them.


    Download Code for Large Buttons (48x48)
    Download Code for Small Buttons (24x24)


    6. Add a title such as Bookmark and Share if you wish

    7. Click on the Save button

    8. Use the drag and drop feature in the sidebar to reposition the new widget if necessary and save again

    9. Click on View Blog to admire new social bookmarking buttons


    How to Add Social Bookmark Buttons Below Every Post in Blogger

    1. Login to Blogger if not already logged in

    2. Navigate to Page Layout > Edit HTML

    3. Back up your template as a precaution by downloading it to your computer

    4. Check the Expand Widget Templates box

    5. Find the following line of code using CTRL + F


    <p><data:post.body/></p>

    or

    <data:post.body/>


    6. Paste the button code below directly below this line


    Download Code for Large Buttons (48x48)
    Download Code for Small Buttons (24x24)


    7. Click on the Save Template button to save

    8. Click on View Blog to admire your new social bookmarking button set at the bottom of your blog


    Tips and Troubleshooting
    • To center the social bookmarking buttons

      <p><data:post.body/></p>
      <div align='center'>
      Your social bookmarking button code goes here
      <br/>
      </div>

    • To have your social bookmarking buttons only appear on post pages you will need to enclose the code in an if statement


      <p><data:post.body/></p>
      <b:if cond='data:blog.pageType == "item"'>
      Your social bookmarking button code goes here
      <br/>
      </b:if>

    • To center the social bookmarking buttons and have them appear only on post pages

      <p><data:post.body/></p>
      <b:if cond='data:blog.pageType == "item"'>
      <div align='center'>
      Your social bookmarking button code goes here
      <br/>
      </div></b:if>

    • To center the social bookmarking buttons and have them appear only on post pages

      <p><data:post.body/></p>
      <b:if cond='data:blog.pageType == "item"'>
      <div align='center'>
      Your social bookmarking button code goes here
      <br/>
      </div></b:if>

    • To add extra social bookmarking buttons to this set download the Aqauticus Icon Set
    • To change the social bookmarking buttons for another set simply do the following:

      1. To find other social bookmarking buttons please do check out my article Best Free Social Bookmark Button Sets for Blogger first as very likely you will find something suitable in that collection. Download your preferred icon set. These will be in a zip file so you will need to unzip them and take a look at what sizes are on offer. Most icon sets come in at least several sizes.
      2. Upload your button images to Blogger or to an image storage site like Photobucket or Flickr. One easy way to upload to Blogger is to create a post called images that you never publish. Then upload the images you want individually (that's the drawback). Copy the URL address of the button image and paste it into the social bookmarking button code replacing existing URLs
      3. Change the URL address of each button in the button code I have supplied. That's the code beginning with scr='

    In today's tutorial you have learned how to add social bookmark buttons using a social bookmarking script to the sidebar, footer and below each post in a Blogger blog (Blogspot blog). I have supplied you with the code for a small and large social bookmarking button set to get you started. I suggest you download the codes first and install them on your blog. Then it is just a simple matter of changing the URL address of the social bookmarking buttons if you wish to substitute these for a new set of social bookmarking buttons. Also in this tutorial I offered you some tips and troubleshooting suggestions for adding your social bookmarking buttons to Blogger. If there are other issues that crop up for you as always please ask. I am interested in hearing from anyone about how they got on installing these social bookmark buttons.


    Related Articles
    List of How Blog Works Tutorials for Blogger Blogs
    Add a Social Bookmarking Button to Blogger
    Best Free Social Bookmark Icon Sets for Blogger
    Read Full Post ...